
Oh, fall! There’s just something magical about the crisp air, the changing leaves, and the cozy feeling of gathering with loved ones. And as we tiptoe closer to Halloween, my kitchen starts to hum with all sorts of festive, comforting, and sometimes, wonderfully whimsical recipes. But let’s be real, sometimes you want all that holiday cheer without all the fuss, right? That’s where these Pumpkin Floats come in! They are literally pure joy in a glass, channeling all the vibrant, fun energy of autumn and Halloween without needing to turn on your oven. Get ready for a treat that tastes like a nostalgic hug and looks like a party!
Why You’ll Love Pumpkin Floats
- Fast: From kitchen to cozy in under 5 minutes! Seriously, this is speed demon level dessert.
- Easy: No baking, no complex steps, just pure, simple assembly. Perfect for all skill levels!
- Giftable (sort of!): While you wouldn’t “gift” a float, the idea is easily shareable and makes for a fantastic party activity.
- Crowd-pleasing: Who doesn’t love ice cream and fizzy soda? This one’s a guaranteed hit with kids and adults alike.
Ingredients
Gather your Halloween happiness! Here’s what you’ll need for two perfectly spooky floats:
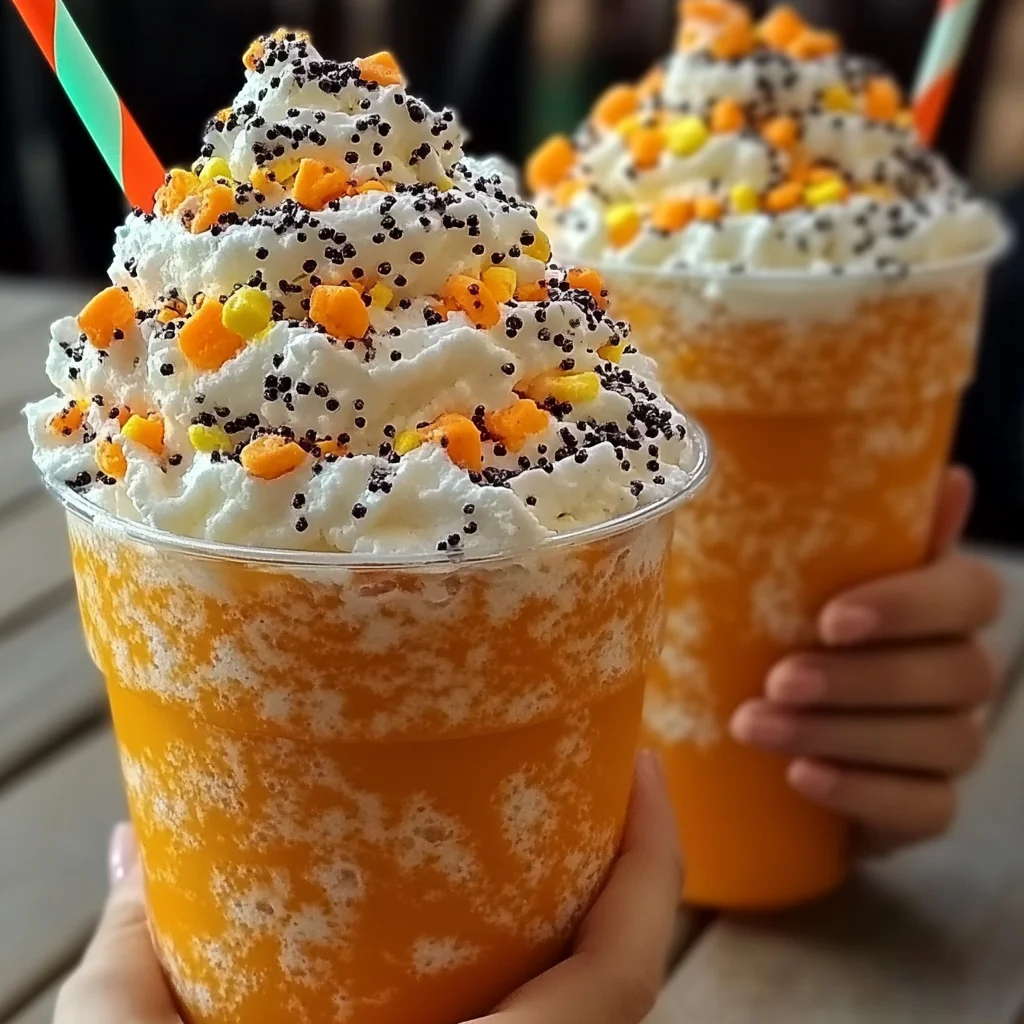
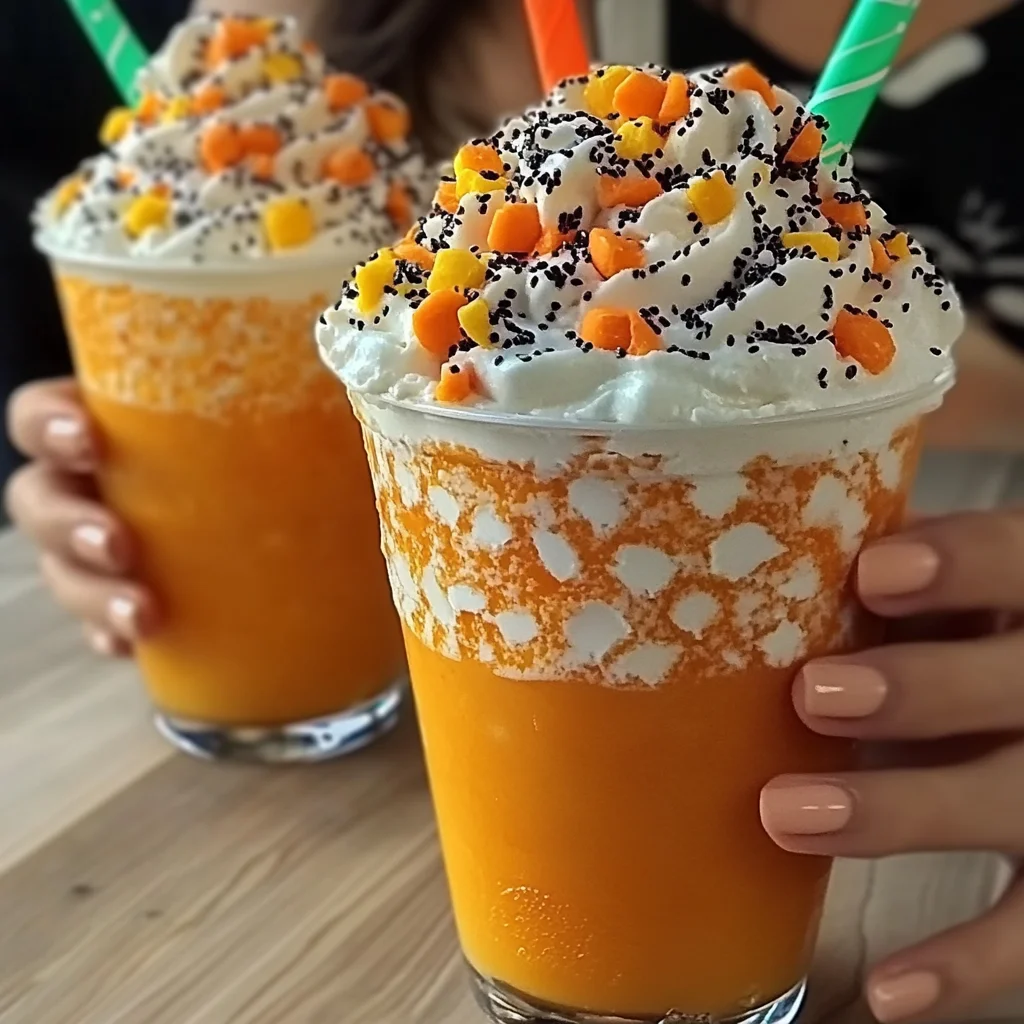
- 2 cups orange soda, chilled: This is the star of our “pumpkin” show! The chilled part is key for maximum fizz and minimal melt.
- 4 scoops vanilla ice cream: Creamy, dreamy vanilla is the perfect canvas. Don’t skimp on good quality here, it makes all the difference!
- Whipped cream (store-bought or homemade): A generous cloud on top is non-negotiable.
- Halloween sprinkles: For that extra festive sparkle and crunch. Grab some fun Halloween-themed ones if you can!
- Candy corn: The quintessential Halloween candy! A few pieces add a classic touch.
- Optional: Black jack-o-lantern face stickers or cups: If you want to take your presentation to the next level, these are super fun for a spooky touch!
How to Make Pumpkin Floats
Alright, grab your apron (or don’t, this is super clean!) and let’s whip up some autumn magic. You’ll be amazed at how quickly these come together!
- First things first, let’s get those cups looking festive! If you’re decorating the rim, grab your clear cups and a shallow dish. Pour a little corn syrup or a thin layer of frosting onto one plate, and your Halloween sprinkles onto another. Dip the rim of each cup into the syrup/frosting, then immediately into the sprinkles, giving it a twist to coat evenly. This is where the magic starts, creating a delightful crunch with every sip!
- Time for the creamy goodness! Carefully drop two generous scoops of vanilla ice cream into each prepared cup. I always lean towards larger scoops because, well, why not?
- Now for the fizzy fun! Slowly, and I mean slowly, pour the chilled orange soda over the ice cream. This is a delicate dance to prevent an overflow of fizz. Watch it bubble up, creating that iconic float magic! If you love this kind of whimsical, easy dessert, you might also adore these Easy Root Beer Float Cupcakes for another fun float-inspired treat!
- Pile on those delightful toppings! Finish each float with a big swirl of whipped cream. Then, go wild with your Halloween sprinkles and tuck in a few pieces of candy corn. If you’re using the optional jack-o-lantern stickers, now’s the time to stick them onto your cups for extra spooky personality! Add a fun straw, and voilà!
Substitutions & Additions
The beauty of a float is how customizable it is! Here are some ideas to make these Pumpkin Floats uniquely yours:
- Soda Swaps: Not an orange soda fan? Try cream soda for a more mellow flavor, ginger ale for a zesty kick, or even grape soda for a “witch’s brew” vibe!
- Ice Cream Adventures: While vanilla is classic, a scoop of pumpkin spice ice cream would be incredible here! You could also try butter pecan, or even a swirl of caramel ice cream for extra indulgence.
- Extra Toppings: Drizzle with caramel sauce or chocolate syrup, add crushed gingersnap cookies for a spiced crusty crunch, or sprinkle with edible glitter for an extra magical touch. Mini chocolate chips always make a happy addition too!
- Adults Only: For a grown-up treat, a splash of spiced rum or vanilla vodka takes these floats to a whole new level. Just be sure to label them clearly if serving to a mixed crowd!
Tips for Success
Making Pumpkin Floats is pretty foolproof, but a few little tricks can make them absolutely perfect!
- Keep it Chilly: Always use very cold soda! This helps prevent the ice cream from melting too quickly and keeps the fizz strong.
- Pour with Patience: That slow pour isn’t just for show – it helps control the foam and prevents overflow.
- Clear Glasses are Best: Part of the charm of a float is seeing those beautiful layers! Use clear glass tumblers or mugs to show off your creation.
- Prep Ahead (Kind Of): While the floats themselves are best made fresh, you can definitely get your cups decorated with sprinkles ahead of time. You could even chill your glasses in the freezer for a few minutes before assembling for an extra frosty treat.
- Beyond Floats: If you’re in the mood for other comforting fall treats that celebrate the season, you have to check out this Easy Pumpkin Pie Stuffed Baked Apples – they’re another fantastic way to enjoy those warm, cozy flavors!
How to Store Pumpkin Floats
Pumpkin Floats are definitely a “make and enjoy immediately” kind of treat. The fizzy soda will eventually deflate, and the ice cream will melt, so they don’t store well once assembled. However, you can store all the ingredients separately! Keep your orange soda in the fridge, ice cream in the freezer, and toppings in airtight containers. That way, you’re always ready to whip up a fresh float whenever the craving strikes!
FAQs
Got questions? I’ve got answers!
Q: Can I use diet soda?
A: Absolutely! Diet orange soda works just as well if you’re looking to cut down on sugar. The flavor and fizz will still be great.
Q: What if I don’t have Halloween sprinkles?
A: No problem! Regular rainbow sprinkles are fun, or you can use crushed cookies (like Oreos or gingersnaps) for a different texture and color. You can also skip them entirely – the candy corn and whipped cream are festive enough!
Q: Can I make a big batch for a party?
A: While you can’t make them far in advance, you can set up a “Pumpkin Float Bar” for a party! Have all the ingredients and toppings laid out, and let your guests assemble their own. It’s a fun, interactive activity everyone will love.
Q: Is there a non-dairy option?
A: Yes! Many brands now offer delicious non-dairy vanilla ice cream (almond, coconut, or oat-based) and non-dairy whipped cream (like coconut whip). These swaps make it easy to enjoy a dairy-free Pumpkin Float!
For more deliciously easy recipes and kitchen inspiration, follow us on Pinterest!

Spooky Sweet Pumpkin Floats
Ingredients
Equipment
Method
- Step 1: Get festive cups ready. If decorating the rim, pour a little corn syrup or a thin layer of frosting onto a shallow dish, and Halloween sprinkles onto another. Dip the rim of each clear cup into the syrup/frosting, then immediately into the sprinkles, giving it a twist to coat evenly.
- Step 2: Add ice cream. Carefully drop two generous scoops of vanilla ice cream into each prepared cup.
- Step 3: Pour soda. Slowly pour the chilled orange soda over the ice cream, preventing an overflow of fizz.
- Step 4: Top and serve. Finish each float with a big swirl of whipped cream, a generous amount of Halloween sprinkles, and a few pieces of candy corn. If using, add jack-o-lantern stickers to your cups. Add a fun straw and serve immediately.


