Oh my goodness, friend. If you’re anything like me, the simple act of unwrapping a Reese’s Peanut Butter Cup brings back a flood of happy memories. That perfect harmony of smooth chocolate and salty, creamy peanut butter… pure bliss, right?
Well, what if I told you that you could capture that exact feeling, but in a giant, sliceable, party-ready pie? And what if I told you it’s ridiculously easy to make and doesn’t even require turning on your oven? Yep, you heard me! This Giant No-Bake Reese’s Peanut Butter Cup Pie is about to become your new go-to for birthdays, holidays, potlucks, or just a Tuesday that needs a serious dose of happy.
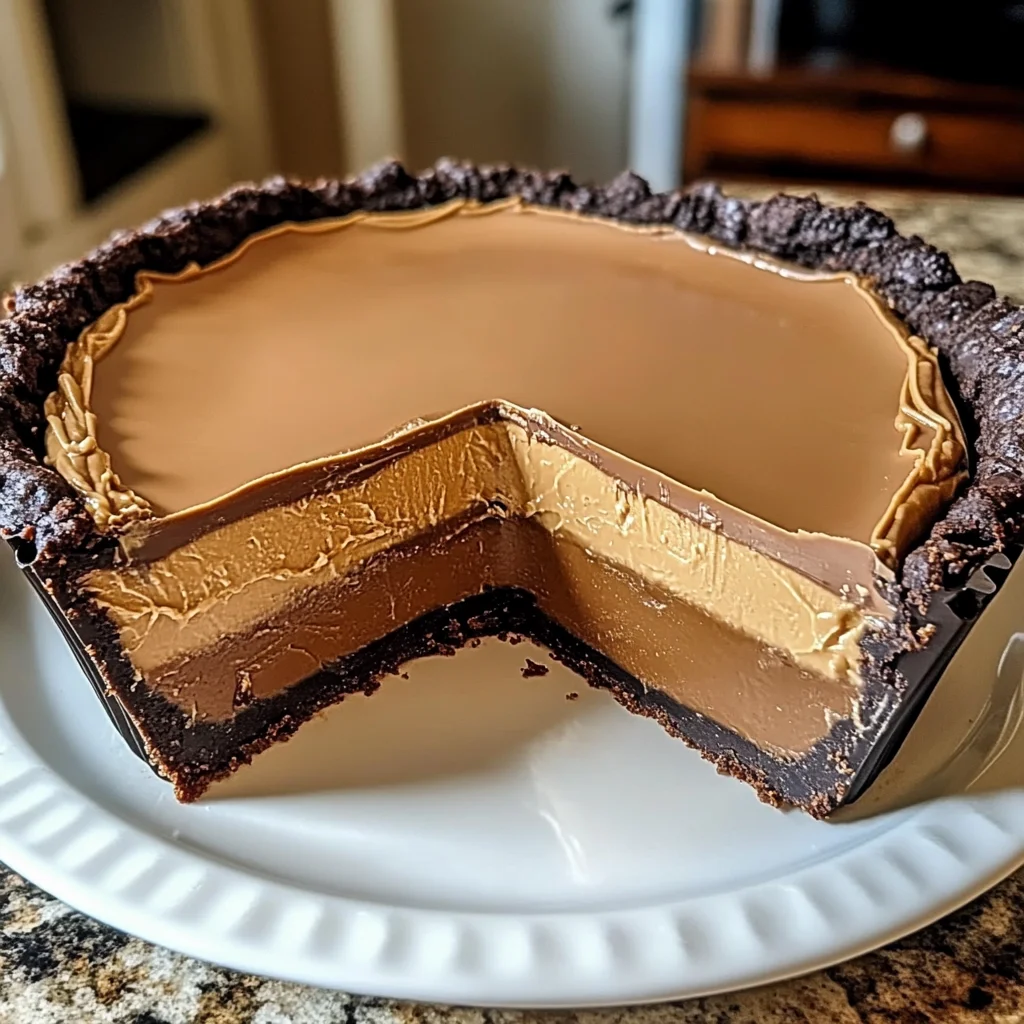
It’s got a rich chocolate crust, a cloud-like peanut butter mousse filling that’s somehow both light and intensely peanut buttery, and a smooth, glossy chocolate ganache poured right over the top. Every bite is like biting into the best peanut butter cup of your life, amplified into pie form. You absolutely have to try this one!
Why You’ll Love This Recipe
- Quick & Easy: Seriously, no baking the filling, minimal steps!
- No-Bake Magic: Perfect for hot days or when your oven is busy.
- Impress Anyone: This pie looks and tastes like you fussed way more than you did.
- Crowd-Pleasing: Who doesn’t love the peanut butter and chocolate combo?
Ingredients
Here’s what you’ll need to gather. Nothing fancy, just good stuff!
- Chocolate Cookie Crust:
- 2½ cups (300g) chocolate cookie crumbs: Think crushed Oreos (cream filling removed or left in, your call!) or even chocolate graham crackers.
- ½ cup (115g) unsalted butter, melted: This binds the crust together beautifully.
- 1 tbsp granulated sugar (optional): A little extra sweetness, especially if using less sweet graham crackers.
- Peanut Butter Mousse:
- 1½ cups (360g) creamy peanut butter: Okay, this is important! Use standard, shelf-stable creamy peanut butter (like Jif or Skippy), not natural or the kind that separates. The standard stuff has stabilizers that are key for the mousse texture.
- 8 oz (225g) full-fat cream cheese, room temperature: Make sure it’s softened! This makes it whip up smooth and creamy.
- 1¼ cups (150g) powdered sugar, sifted: Sifting helps prevent lumps in your smooth mousse.
- 1 tsp pure vanilla extract: Adds that lovely warm flavor note.
- 1½ cups (360ml) heavy cream, chilled: Gotta be cold to whip into those glorious stiff peaks!
- ¼ tsp salt: A little pinch balances the sweetness and enhances the peanut butter flavor.
- Chocolate Ganache:
- 1 cup (175g) semi-sweet chocolate chips: Your standard baking chips work perfectly.
- ½ cup (120ml) heavy cream: This makes the ganache rich and pourable.
- 1 tbsp (14g) unsalted butter: Adds a beautiful sheen and smooth texture to the ganache.
- Pinch of sea salt (optional): Enhances the chocolate flavor and echoes the peanut butter.
How to Make It
Alright, let’s get this party started! Follow these simple steps, and you’ll have a showstopper pie ready in no time (well, plus chilling time!).
1. Make the Crust: Grab a bowl and combine your chocolate cookie crumbs with the melted butter and optional sugar. Stir it all up until the crumbs look wet and sticky and hold together when you pinch them. Now, pour this mixture into a 9-inch pie dish. Use the bottom of a glass or your clean hands to firmly press the crumbs into the bottom and up the sides of the dish. You want a nice, compact crust! Pop this into the freezer for about 15 minutes to let it set up while you make the filling.
2. Whip Up the Mousse: In a large bowl, beat your softened cream cheese with an electric mixer until it’s super smooth – no lumps allowed! Add the creamy peanut butter, sifted powdered sugar, vanilla extract, and salt. Mix until everything is well combined and gloriously creamy. Don’t forget to scrape down the sides of the bowl so everything gets incorporated!
3. Fold in the Whipped Cream: In a separate, chilled bowl (using a cold bowl helps!), whip your cold heavy cream using clean beaters until stiff peaks form. You know it’s ready when you lift the beaters and the cream stands up straight without flopping over. Now, this is where the magic happens: gently fold the whipped cream into the peanut butter mixture. Do this in three additions, being careful not to deflate that lovely whipped cream. You want to use a spatula and scoop from the bottom up, turning the bowl, until just combined and light and airy. Don’t overmix!
4. Fill and Chill: Spoon the peanut butter mousse filling into your chilled chocolate crust. Use a spatula to smooth the top nicely. Cover the pie loosely with plastic wrap (you can tent it slightly so it doesn’t touch the filling) and pop it back in the fridge. It needs at least 2 hours to set up properly. I know, the waiting is the hardest part!
5. Prepare the Ganache: Once the pie is close to finishing its chill time, get your ganache ready. Put your chocolate chips and the tablespoon of butter in a heatproof bowl. Heat the half cup of heavy cream in a small saucepan or the microwave until it’s steaming hot but not boiling. Pour the hot cream over the chocolate chips and butter. Let it sit undisturbed for about 3 minutes. This gives the chocolate time to melt. Then, grab a whisk and stir gently from the center outwards until the mixture is completely smooth and glossy. If you’re using it, stir in a pinch of sea salt.
6. Ganache Time & Final Chill: Take your chilled pie out of the fridge. Pour the warm (but not hot!) ganache evenly over the top of the peanut butter mousse. Gently tilt the pie dish to help the ganache spread into a beautiful, even layer. Put the pie back in the fridge for at least 1 more hour to allow the ganache to set up.
7. Slice and Enjoy: When you’re ready to serve, grab a sharp knife. For the cleanest slices, dip your knife in hot water and wipe it clean between each cut. This helps it glide through the ganache and mousse without dragging. Garnish with crushed peanuts, chocolate shavings, or mini peanut butter cups if you’re feeling extra!
Substitutions & Additions
One of the fun things about recipes is making them your own! Here are a few ideas:
- Different Crust: Not a chocolate fan? Try using Nutter Butter cookies for an extra peanut butter punch, or even vanilla wafers!
- Crunchy Peanut Butter: If you really love texture, you could try crunchy peanut butter in the mousse, just be aware it will change the smooth consistency. (Still stick to standard, non-separating PB though!).
- Mix-Ins: Fold mini chocolate chips, chopped mini peanut butter cups, or even chopped peanuts directly into the peanut butter mousse before chilling.
- Ganache Variations: Use milk chocolate chips for a sweeter ganache, or dark chocolate for a richer, less sweet topping. You could also drizzle melted white chocolate over the dark ganache for a pretty swirl effect.
- Extra Toppings: Go wild with toppings! Whipped cream, more crushed cookies, sprinkles, chopped Reese’s cups, a drizzle of extra peanut butter… the possibilities are endless!
Tips for Success
Want to make sure your pie turns out absolutely perfect? Keep these things in mind:
- Room Temperature Cream Cheese: This is key for a smooth, lump-free mousse. Take it out of the fridge at least an hour before you start.
- Cold Heavy Cream: Ensure your heavy cream is well-chilled for whipping. A cold bowl and cold beaters help too!
- Don’t Overmix the Mousse: Once you fold in the whipped cream, stop mixing as soon as it’s just combined. Overmixing can deflate it and make the mousse less airy.
- Chill Times Are Important: Don’t rush the chilling! The 2 hours for the mousse and 1 hour for the ganache (at least!) allow everything to firm up so you get clean slices.
- Hot Knife for Slicing: Seriously, the hot water trick is a game-changer for slicing through both the ganache and the creamy mousse cleanly.
- Prep Ahead: You can make the crust a day in advance and keep it in the freezer. You can also make the peanut butter mousse a day ahead; it might be slightly firmer, but still delicious. Make the ganache just before you’re ready to pour it.
How to Store It
This pie needs to stay chilled! Keep any leftovers covered tightly with plastic wrap or in an airtight container in the refrigerator. It should stay delicious for 3-4 days. I honestly doubt it will last that long, though!
FAQs
- Can I use natural peanut butter?
Unfortunately, no. Natural peanut butter separates and doesn’t have the stabilizers needed to help the mousse set up properly into that dreamy, stable texture. Stick to standard creamy peanut butter for this recipe!
- How long does the pie need to chill before serving?
A minimum of 2 hours for the mousse to set, plus another 1 hour after adding the ganache. So, at least 3 hours total in the fridge before you slice into it.
- What if my ganache isn’t smooth?
Make sure you poured hot cream over the chocolate and let it sit without stirring for a few minutes first. If it’s still a little clumpy, you can gently heat the bowl over a pot of simmering water (creating a double boiler) and stir until smooth, or microwave it in very short bursts (10-15 seconds), stirring in between, until smooth. Be careful not to overheat!
- Can I make the crust from scratch?
Absolutely! You can use your favorite homemade chocolate cookie or graham cracker crust recipe instead of the crumb method described here.
Seriously, this pie is a winner. It’s everything you love about a Reese’s, magnified into a dessert that’s perfect for sharing (or not!). Give it a try and let me know what you think!
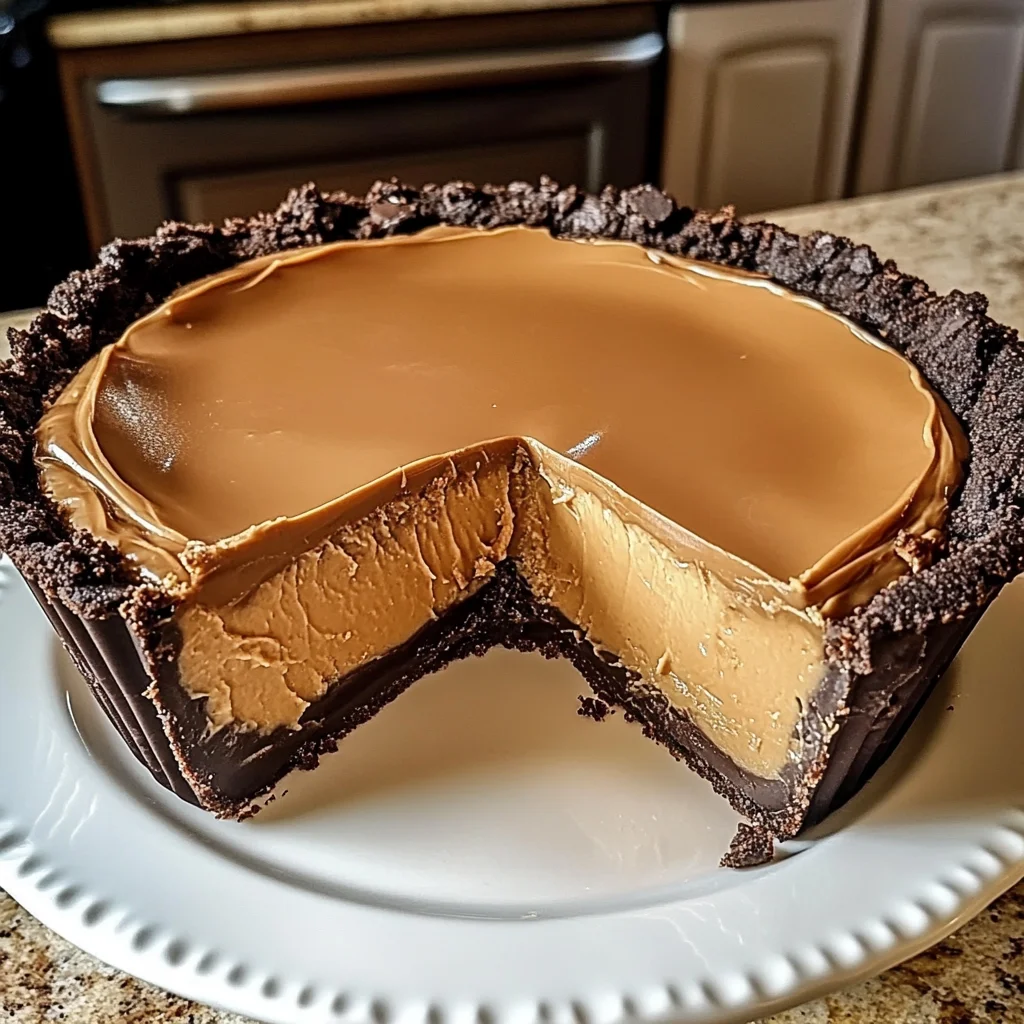
Giant No-Bake Reese's Peanut Butter Cup Pie
Ingredients
Equipment
Method
- Step 1: Make the Crust: Grab a bowl and combine your chocolate cookie crumbs with the melted butter and optional sugar. Stir it all up until the crumbs look wet and sticky and hold together when you pinch them. Now, pour this mixture into a 9-inch pie dish. Use the bottom of a glass or your clean hands to firmly press the crumbs into the bottom and up the sides of the dish. You want a nice, compact crust! Pop this into the freezer for about 15 minutes to let it set up while you make the filling.
- Step 2: Whip Up the Mousse: In a large bowl, beat your softened cream cheese with an electric mixer until it's super smooth – no lumps allowed! Add the creamy peanut butter, sifted powdered sugar, vanilla extract, and salt. Mix until everything is well combined and gloriously creamy. Don't forget to scrape down the sides of the bowl so everything gets incorporated!
- Step 3: Fold in the Whipped Cream: In a separate, chilled bowl (using a cold bowl helps!), whip your cold heavy cream using clean beaters until stiff peaks form. You know it's ready when you lift the beaters and the cream stands up straight without flopping over. Now, this is where the magic happens: gently fold the whipped cream into the peanut butter mixture. Do this in three additions, being careful not to deflate that lovely whipped cream. You want to use a spatula and scoop from the bottom up, turning the bowl, until just combined and light and airy. Don't overmix!
- Step 4: Fill and Chill: Spoon the peanut butter mousse filling into your chilled chocolate crust. Use a spatula to smooth the top nicely. Cover the pie loosely with plastic wrap (you can tent it slightly so it doesn't touch the filling) and pop it back in the fridge. It needs at least 2 hours to set up properly. I know, the waiting is the hardest part!
- Step 5: Prepare the Ganache: Once the pie is close to finishing its chill time, get your ganache ready. Put your chocolate chips and the tablespoon of butter in a heatproof bowl. Heat the half cup of heavy cream in a small saucepan or the microwave until it's steaming hot but not boiling. Pour the hot cream over the chocolate chips and butter. Let it sit undisturbed for about 3 minutes. This gives the chocolate time to melt. Then, grab a whisk and stir gently from the center outwards until the mixture is completely smooth and glossy. If you're using it, stir in a pinch of sea salt.
- Step 6: Ganache Time & Final Chill: Take your chilled pie out of the fridge. Pour the warm (but not hot!) ganache evenly over the top of the peanut butter mousse. Gently tilt the pie dish to help the ganache spread into a beautiful, even layer. Put the pie back in the fridge for at least 1 more hour to allow the ganache to set up.
- Step 7: Slice and Enjoy: When you're ready to serve, grab a sharp knife. For the cleanest slices, dip your knife in hot water and wipe it clean between each cut. This helps it glide through the ganache and mousse without dragging. Garnish with crushed peanuts, chocolate shavings, or mini peanut butter cups if you're feeling extra!