
Remember those magical Christmases as a kid? The twinkling lights, the cozy sweaters, and the absolute best part: a platter of homemade treats! For me, nothing quite captured that holiday spirit like a square of creamy, melt-in-your-mouth fudge. It felt like pure magic, and honestly, a little intimidating to make. But what if I told you that you could recreate that same festive joy with a recipe so incredibly easy, it practically makes itself? This Swirled Christmas Fudge is exactly that – a simple, delightful treat that brings all the nostalgic feels without any of the fuss.
This recipe is quick, uses just a few ingredients, and is so memorable, your loved ones will ask for it year after year. It’s the perfect way to add a homemade touch to your holiday season, whether you’re sharing it at a potluck, gifting it to friends, or just enjoying a sweet moment by the fire.
Why You’ll Love Christmas Fudge
- Fast: Ready to chill in under 15 minutes!
- Easy: Just a few simple ingredients and no candy thermometer required.
- Giftable: Perfect for holiday treat boxes, hostess gifts, or neighborly cheer.
- Crowd-pleasing: A universally loved classic that disappears quickly!
Ingredients
Get ready for the simplest ingredient list ever! You might even have these staples in your pantry already.
- 22 ounces white chocolate chips: The creamy base for our festive colors! Make sure to use good quality ones for the best melt and flavor.
- 1¾ cups vanilla frosting: Our secret weapon for ultimate creaminess and sweetness. Canned frosting works perfectly here, no need for homemade – we’re all about easy this season!
- 1 teaspoon red gel food coloring: For that vibrant, classic holiday red. Gel coloring gives the best intense color without thinning your fudge, which is exactly what we want.
- 1 teaspoon green gel food coloring: And of course, a beautiful evergreen green! Again, gel is your friend here for bright, rich hues.
How to Make Christmas Fudge
You won’t believe how straightforward this recipe is! Let’s get cooking (well, melting and swirling!).
- First things first, let’s get our pan ready. Grab an 8×8-inch square baking pan and line it with parchment paper. Make sure to leave some overhang on the sides – trust me, this will make lifting the fudge out so much easier later on!
- Next, we’re going to create a double boiler. If you don’t have a fancy one, no worries! Just set a heat-safe bowl over a pot of simmering water on your stovetop over medium-low heat. Make sure the bottom of the bowl doesn’t touch the water.
- Into that top bowl, add your white chocolate chips and vanilla frosting. Stir the mixture gently every couple of minutes. You’ll watch as the chocolate chips slowly melt into the frosting, becoming one glorious, smooth, and glossy mixture. This usually takes about 8-10 minutes. Once it’s completely smooth, remove the bowl from the heat.
- Now for the fun part! Divide your melted chocolate and frosting mixture equally into three separate bowls.
- To the first bowl, add your red gel food coloring. Stir it well until the color is completely blended and you have a beautiful, vibrant red.
- Do the same with the second bowl, adding the green gel food coloring and stirring until it’s a lovely, deep green. The third bowl, of course, will remain a pristine white.
- Time to create our festive swirl! Using a large spoon, randomly dollop about 2 tablespoons of each colored mixture into your prepared pan. Don’t overthink it – just alternate colors as you go.
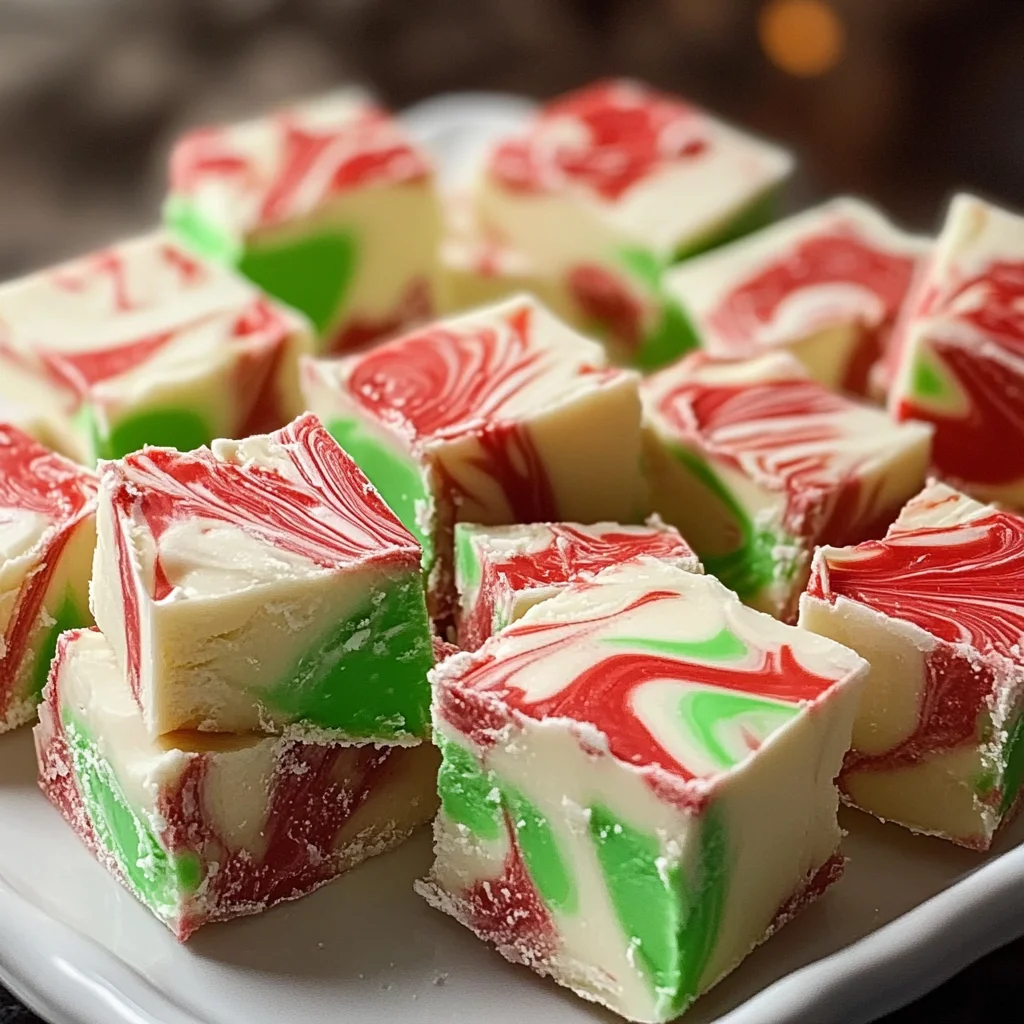
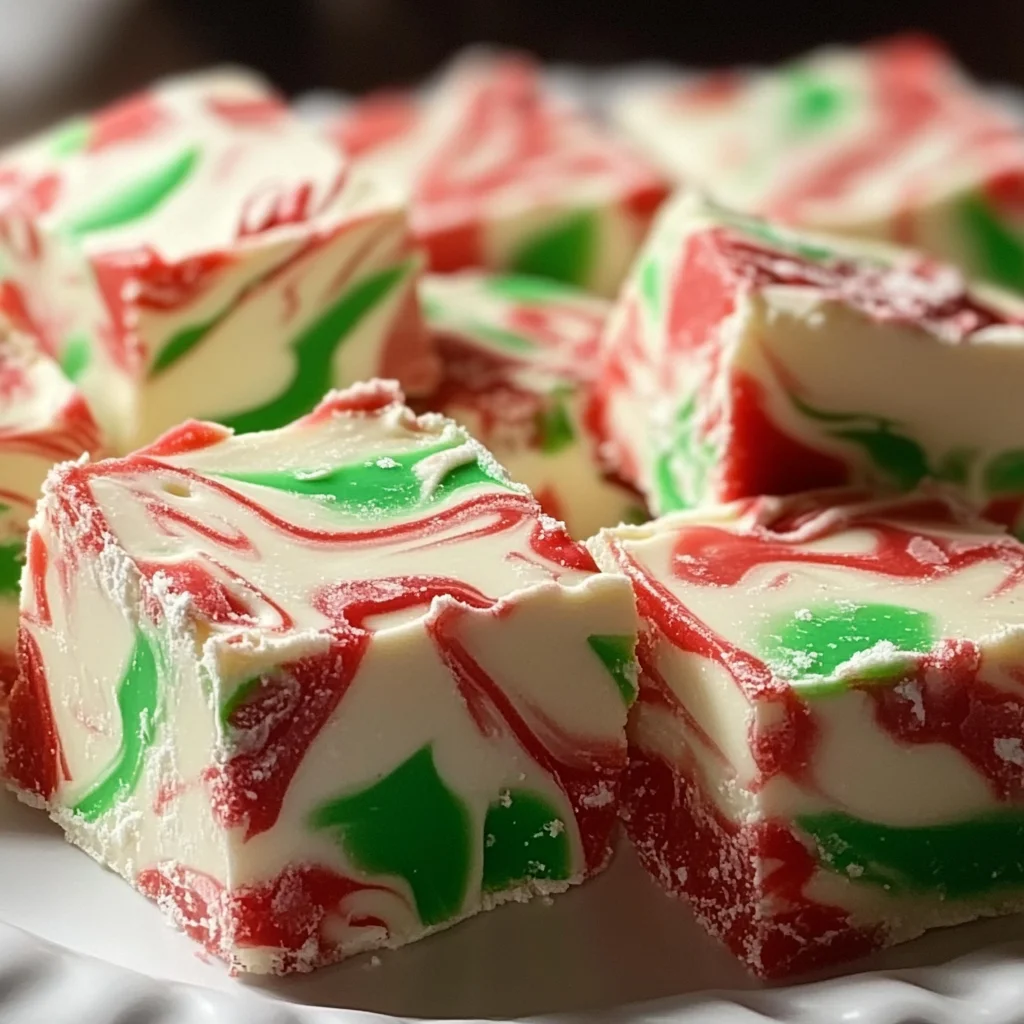
- Once all the chocolate is in the pan, grab a butter knife. Gently swirl the colors together. You’re not mixing them completely, just creating pretty, wavy patterns.
- Now, the hardest part: waiting! Pop the fudge into the refrigerator, uncovered, for 1-2 hours, or until it’s completely firm and set.
- When your fudge is perfectly firm, lift it out of the pan using those handy parchment paper overhangs. Let it sit at room temperature for about 20 minutes; this makes it much easier to slice neatly. Then, cut it into delightful squares and serve!
Substitutions & Additions
One of the best things about this Christmas fudge recipe is how versatile it is! Here are a few ideas to get your creative juices flowing:
- Chocolate Swap: Not a fan of white chocolate? You can absolutely use semi-sweet or dark chocolate chips for a richer fudge. Just note that the colors won’t show up as vividly.
- Flavor Boosts: Add a few drops of peppermint extract or almond extract with your food coloring for a different flavor profile.
- Mix-ins: Before chilling, sprinkle your fudge with festive sprinkles, crushed candy canes, mini chocolate chips, chopped nuts, or even mini marshmallows.
- Other Candies: Gently press some holiday M&M’s or small pieces of your favorite Christmas candies into the top right after swirling.
If you’re a fan of easy, no-bake desserts with a satisfying crunch, you might also love my recipe for easy no-bake caramel pretzel bars – they’re another fantastic giftable treat!
Tips for Success
Even though this recipe is super easy, a few little tricks can make it absolutely perfect every time!
- Don’t Overheat: The double boiler method is key to preventing your chocolate from seizing or burning. If you opt for the microwave (see FAQs), go slow and stir often.
- Gel vs. Liquid: Stick with gel food coloring! Liquid food coloring can add too much moisture and change the texture of your fudge, making it less firm.
- Patience is a Virtue: Don’t rush the chilling process. Properly set fudge is much easier to slice and has that perfect, melt-in-your-mouth texture.
- Clean Slices: For clean, sharp cuts, use a large, sharp knife. You can even run your knife under hot water and wipe it dry between slices for an extra-smooth finish.
For another classic holiday dessert that’s surprisingly easy, check out my Holiday Eggnog Pie – it’s always a showstopper!
How to Store Christmas Fudge
This fudge keeps wonderfully, making it perfect for making ahead!
- Countertop: Store your Christmas fudge in an airtight container at room temperature for up to 3-5 days.
- Refrigerator: For longer storage, keep it in an airtight container in the fridge for up to 1-2 weeks. Let it come to room temperature for about 15 minutes before serving for the best texture.
- Freezer: Yes, you can freeze fudge! Wrap individual pieces or blocks tightly in plastic wrap, then place them in a freezer-safe bag or container. It will keep for up to 2-3 months. Thaw in the refrigerator overnight or at room temperature for a few hours.
FAQs
Can I use different colors for other holidays?
Absolutely! This recipe is a fantastic base for any holiday. Think orange and black for Halloween, pastels for Easter, or red, white, and blue for the Fourth of July!
Do I have to use a double boiler? Can I microwave the ingredients?
While I prefer the double boiler for consistent, gentle melting, you can microwave the white chocolate chips and vanilla frosting. Just be very careful! Heat in 30-second intervals, stirring thoroughly after each, until smooth. Overheating in the microwave can seize the chocolate.
My fudge turned out crumbly. What went wrong?
Crumbly fudge is usually a sign that the chocolate mixture was overheated. The double boiler method helps prevent this, but if microwaving, remember to heat in short bursts and stir frequently. There’s no fixing seized chocolate, unfortunately, so careful heating is key!
How can I make this fudge even more festive?
Beyond the colored swirls, you can add edible glitter, festive sprinkles, or even small holiday-themed candy pieces pressed into the top before chilling. A sprinkle of sea salt can also really make the flavors pop!
If you’re looking for another quick and delightful no-bake treat, my No-Bake Oreo Bars are always a hit!
For more delicious recipes, holiday inspiration, and kitchen fun, be sure to follow us on Pinterest!

Easy Swirled Christmas Fudge
Ingredients
Equipment
Method
- Step 1: Prepare an 8x8-inch square baking pan by lining it with parchment paper, leaving some overhang on the sides for easy lifting.
- Step 2: Set up a double boiler: place a heat-safe bowl over a pot of simmering water on medium-low heat, ensuring the bottom of the bowl does not touch the water.
- Step 3: Add white chocolate chips and vanilla frosting to the top bowl of the double boiler. Stir gently every couple of minutes until the mixture is completely smooth and glossy, about 8-10 minutes. Remove the bowl from heat.
- Step 4: Divide the melted chocolate and frosting mixture equally into three separate bowls.
- Step 5: To the first bowl, add the red gel food coloring and stir until a vibrant red color is achieved.
- Step 6: To the second bowl, add the green gel food coloring and stir until a lovely, deep green color is achieved. The third bowl will remain white.
- Step 7: Using a large spoon, randomly dollop about 2 tablespoons of each colored mixture into the prepared pan, alternating colors as you go.
- Step 8: Once all the chocolate is in the pan, use a butter knife to gently swirl the colors together, creating wavy patterns without fully mixing them.
- Step 9: Place the fudge into the refrigerator, uncovered, for 1-2 hours, or until it is completely firm and set.
- Step 10: Once firm, lift the fudge out of the pan using the parchment paper overhangs. Let it sit at room temperature for about 20 minutes before slicing into delightful squares with a large, sharp knife. Serve immediately.


