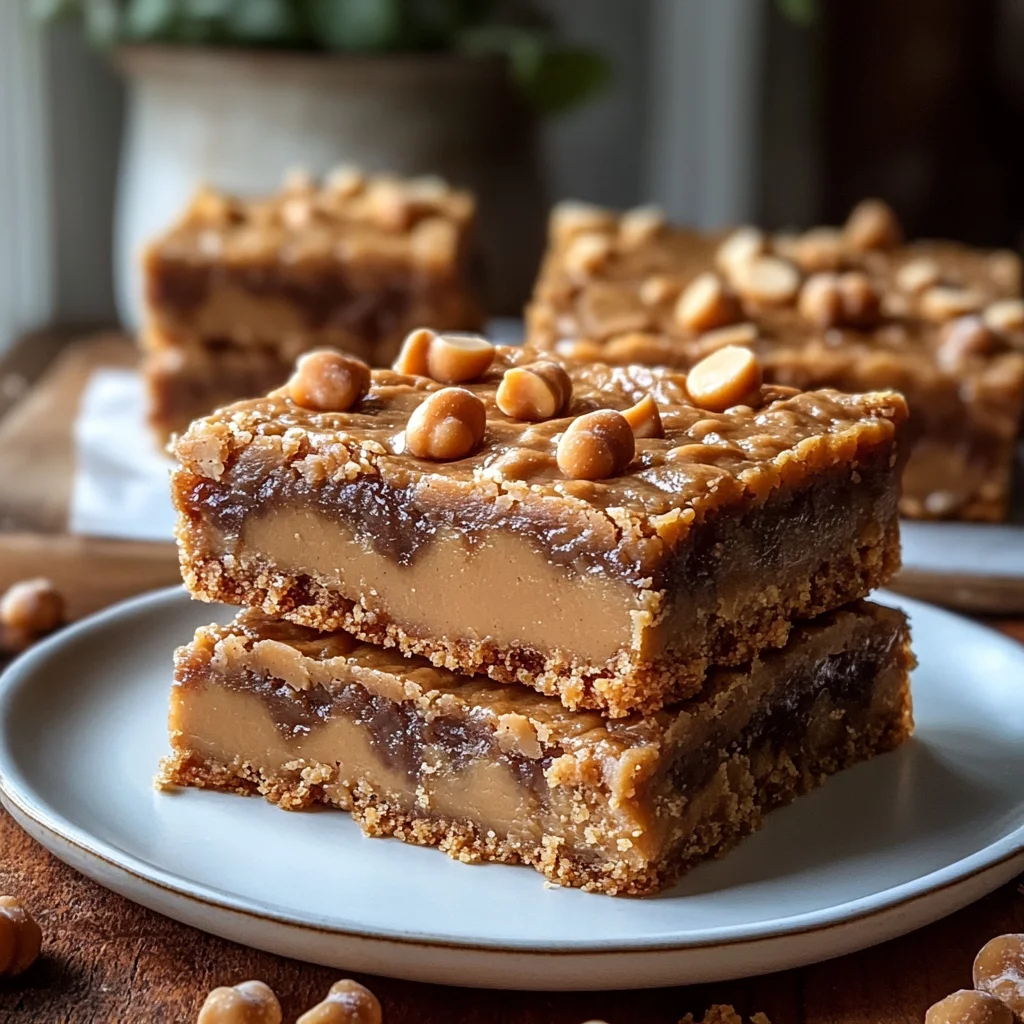
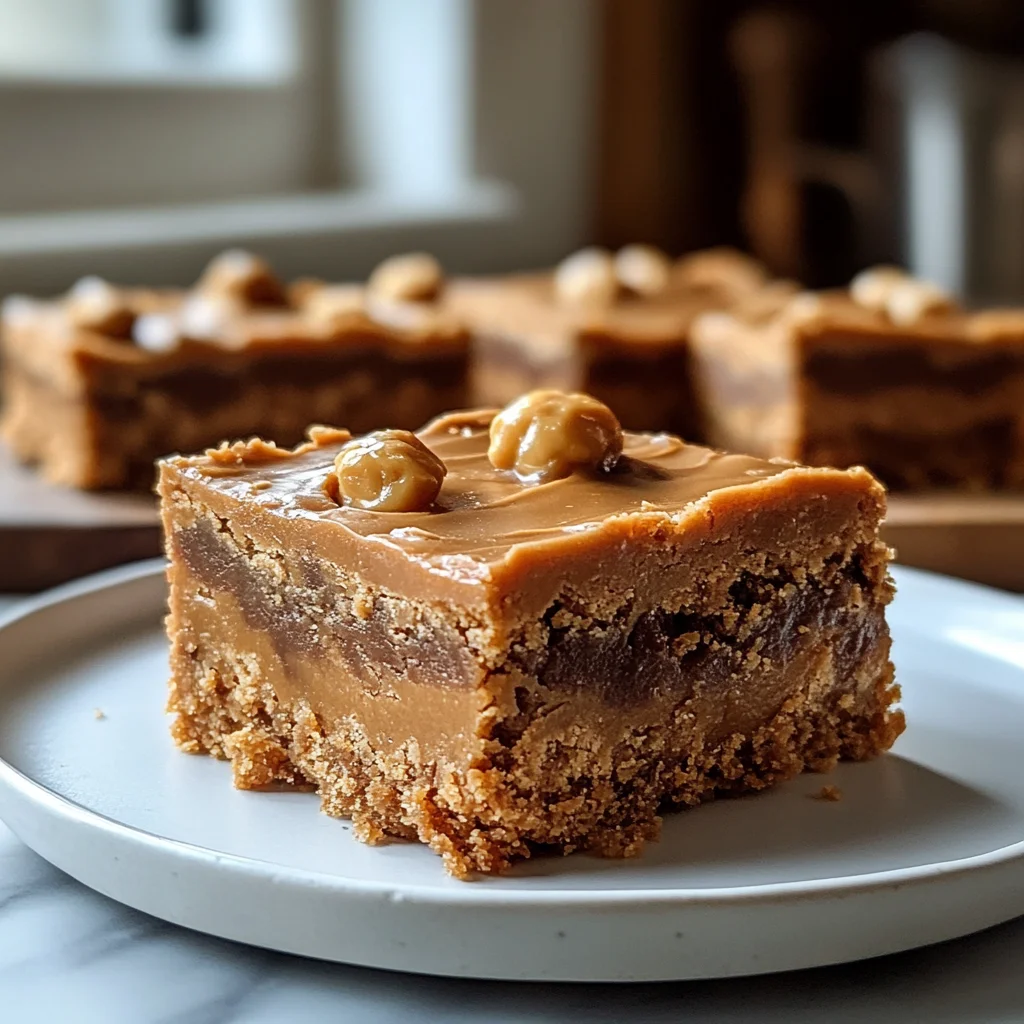
Oh, friend, do I have a treat for you today! There are some desserts that just whisper “comfort” and “childhood” right into your soul, and for me, these Peanut Butter Butterscotch Bars are absolutely one of them. I remember whipping up batches of these with my grandma on lazy Saturday afternoons, the sweet scent of peanut butter and butterscotch filling the whole kitchen. They were always the first thing to disappear at any potluck, picnic, or family gathering. If you love the irresistible combination of peanut butter and sweet treats, you’ll also adore my easy no-bake peanut butter cup poke cake!
If you’re looking for a dessert that delivers on big flavor with minimal fuss, you’ve hit the jackpot. These bars are so incredibly easy to make, practically fool-proof, and they come together in a flash. Seriously, you’ll be enjoying that perfect chewy, sweet, and nutty bite in no time. Get ready to make some delicious memories!
Why You’ll Love Peanut Butter Butterscotch Bars
- Fast: Quick prep means more time for enjoying!
- Easy: Simple ingredients and straightforward steps – perfect for any baker.
- Giftable: They travel well and always bring a smile.
- Crowd-pleasing: A flavor combination that everyone adores.
Ingredients
- 1/2 cup unsalted butter, melted: Melting the butter first gives these bars their wonderful chewy texture. Unsalted gives you control over the saltiness!
- 1 cup creamy peanut butter: The star of the show! Make sure it’s creamy for that smooth, melt-in-your-mouth consistency.
- 1 cup packed brown sugar: This adds a lovely moistness and a deeper, molasses-y sweetness.
- 1/4 cup granulated sugar: Just enough to balance the brown sugar and contribute to that perfect chew.
- 2 large eggs: Our essential binder, holding all that deliciousness together.
- 1 teaspoon vanilla extract: Don’t skip this! It enhances all the other flavors beautifully.
- 1 1/2 cups all-purpose flour: The backbone of our bars, providing structure without being too dense.
- 1 teaspoon baking powder: Gives our bars a little lift so they’re not too flat.
- 1/4 teaspoon salt: A pinch of salt is crucial to balance the sweetness and truly make the peanut butter flavor pop!
- 1 cup butterscotch chips: The namesake and sweet, buttery counterpoint to the peanut butter.
- 1/2 cup chocolate chips (optional): Because peanut butter and chocolate are a match made in heaven, right?
How to Make Peanut Butter Butterscotch Bars
Ready to get baking? This is where the magic happens, and trust me, it’s super simple!
- Prep Your Oven & Pan: First things first, go ahead and preheat your oven to a cozy 350°F (175°C). Then, grab a 9×13-inch baking dish. You can either grease it really well, or for super easy cleanup and removal, I highly recommend lining it with parchment paper, leaving a little overhang on the sides. This makes lifting the cooled bars out a breeze!
- Whisk the Wet Ingredients: In a large mixing bowl, combine your melted butter, creamy peanut butter, brown sugar, and granulated sugar. Give it a good whisk until everything is beautifully smooth and well combined. You want to make sure there are no lumps of sugar hanging out.
- Add Eggs & Vanilla: Now, crack in those large eggs and pour in the vanilla extract. Beat them into the mixture until everything is thoroughly combined. You’re building the foundation for incredibly moist and flavorful bars!
- Introduce the Dry Ingredients: Gently add the all-purpose flour, baking powder, and salt to your wet mixture. Stir everything together until it’s just combined. The key here is not to overmix! Overmixing can lead to tough bars, and we want them perfectly tender and chewy.
- Fold in the Chips: This is my favorite part! Carefully fold in the glorious butterscotch chips. If you’re a chocolate lover like I am, now’s the time to toss in those optional chocolate chips too. Make sure they’re evenly distributed throughout the batter.
- Spread & Bake: Pour your delightful batter into the prepared pan and spread it out evenly with a spatula. Pop it into your preheated oven and bake for 25 to 30 minutes. You’ll know they’re ready when the edges are a beautiful light golden brown and a toothpick inserted into the center comes out with only a few moist crumbs. A little moist is good; completely clean means overbaked.
- Cool Completely: This step is crucial for perfect bars! Let them cool completely in the pan before you even think about slicing them. I know, it’s hard to resist, but cooling allows them to set properly, giving you nice, clean squares. Patience, my friend, it pays off!
Once cooled, slice them into squares and get ready to enjoy a little piece of peanut butter butterscotch heaven!
Substitutions & Additions
One of the best things about these Peanut Butter Butterscotch Bars is how adaptable they are! Feel free to get creative and make them truly your own:
- Nut Butter Swaps: While peanut butter is classic, you could experiment with almond butter or cashew butter for a different flavor profile. Just make sure it’s creamy!
- Chip Choices: Not a butterscotch fan? No problem! Swap them out for all chocolate chips, white chocolate chips, or even a mix of milk and dark chocolate. Think of these as a fantastic base, much like when I get creative with easy chocolate chip cheesecake bars.
- Add-ins: For extra texture, consider folding in 1/2 cup of chopped nuts (pecans, walnuts), pretzels for a salty crunch, or even mini marshmallows towards the end of baking for a gooey twist.
- Top it Off: A drizzle of melted chocolate or a sprinkle of flaky sea salt after cooling takes these bars to the next level!
Tips for Success
- Don’t Overmix: This is a golden rule for many baked goods! Once you add the flour, mix just until no dry streaks remain. Overmixing develops gluten, leading to tough, less tender bars.
- Don’t Overbake: Keep a close eye on your bars, especially after the 20-minute mark. They should look slightly soft in the center when you pull them out, as they’ll continue to set as they cool. Overbaked bars will be dry and crumbly.
- Cool Completely: Seriously, I can’t stress this enough! Warm bars are notoriously difficult to slice cleanly. Let them chill out in the pan for a good hour or two, or even pop them in the fridge to speed up the process if you’re in a hurry.
- Parchment Paper is Your Friend: Lining your baking dish with parchment paper (with a little overhang) is a game-changer. It makes lifting the entire batch out incredibly easy, allowing for perfect, clean slices. It’s a trick I often use when making other bar treats, like no-bake chocolate peanut butter bars.
- Room Temperature Eggs: While not strictly necessary for this recipe, using room temperature eggs for baking always helps them incorporate more smoothly into the batter, leading to a more uniform texture.
How to Store Peanut Butter Butterscotch Bars
These bars are so good, they might not last long enough to need storing, but just in case, here’s how to keep them fresh:
- Room Temperature: Store cooled bars in an airtight container at room temperature for up to 3-4 days. They’ll stay wonderfully soft and chewy.
- Refrigerator: For a slightly firmer bar and extended freshness, you can store them in an airtight container in the refrigerator for up to a week. Just bring them to room temperature or warm them slightly in the microwave for a few seconds before serving for that perfect texture.
- Freezing: Yes, you can freeze them! Place cooled and sliced bars in a single layer on a baking sheet and freeze until solid. Then transfer them to a freezer-safe bag or airtight container, separated by parchment paper, for up to 2-3 months. Thaw at room temperature before serving.
FAQs
- Can I use crunchy peanut butter instead?
- You sure can! While I typically use creamy for a smoother bar, crunchy peanut butter will add a delightful textural element and extra peanut-y goodness. It’s all about your preference!
- Why did my bars turn out dry?
- The most common culprit for dry bars is overbaking. Keep an eye on them, and remember they will continue to set as they cool. Pull them out when a toothpick still has a few moist crumbs attached.
- Can I make these gluten-free?
- While this recipe isn’t naturally gluten-free, you could try substituting the all-purpose flour with a 1:1 gluten-free baking flour blend. Results may vary slightly in texture, but it’s worth a shot!
- Do I have to use butterscotch chips?
- Nope! While they give these bars their signature butterscotch flavor, you can absolutely substitute them with more chocolate chips, white chocolate chips, or any other kind of baking chip you love. Feel free to get creative!
For more delicious and easy recipes, be sure to follow us on Pinterest!
Peanut Butter Butterscotch Bars
Ingredients
Equipment
Method
- Step 1: Preheat your oven to 350°F (175°C). Grease a 9x13-inch baking dish or line it with parchment paper, leaving a slight overhang on the sides for easy removal.
- Step 2: In a large mixing bowl, combine melted butter, creamy peanut butter, brown sugar, and granulated sugar. Whisk until smooth and well combined, ensuring no sugar lumps remain.
- Step 3: Crack in the large eggs and pour in the vanilla extract. Beat into the mixture until thoroughly combined, forming the foundation for moist and flavorful bars.
- Step 4: Gently add the all-purpose flour, baking powder, and salt to the wet mixture. Stir until just combined, being careful not to overmix to ensure tender, chewy bars.
- Step 5: Carefully fold in the butterscotch chips. If desired, add the optional chocolate chips, ensuring they are evenly distributed throughout the batter.
- Step 6: Pour the batter into the prepared pan and spread it out evenly with a spatula. Bake for 25 to 30 minutes, or until the edges are light golden brown and a toothpick inserted into the center comes out with only a few moist crumbs.
- Step 7: Let the bars cool completely in the pan before slicing. This allows them to set properly, resulting in clean, perfect squares. Once cooled, slice and serve immediately.