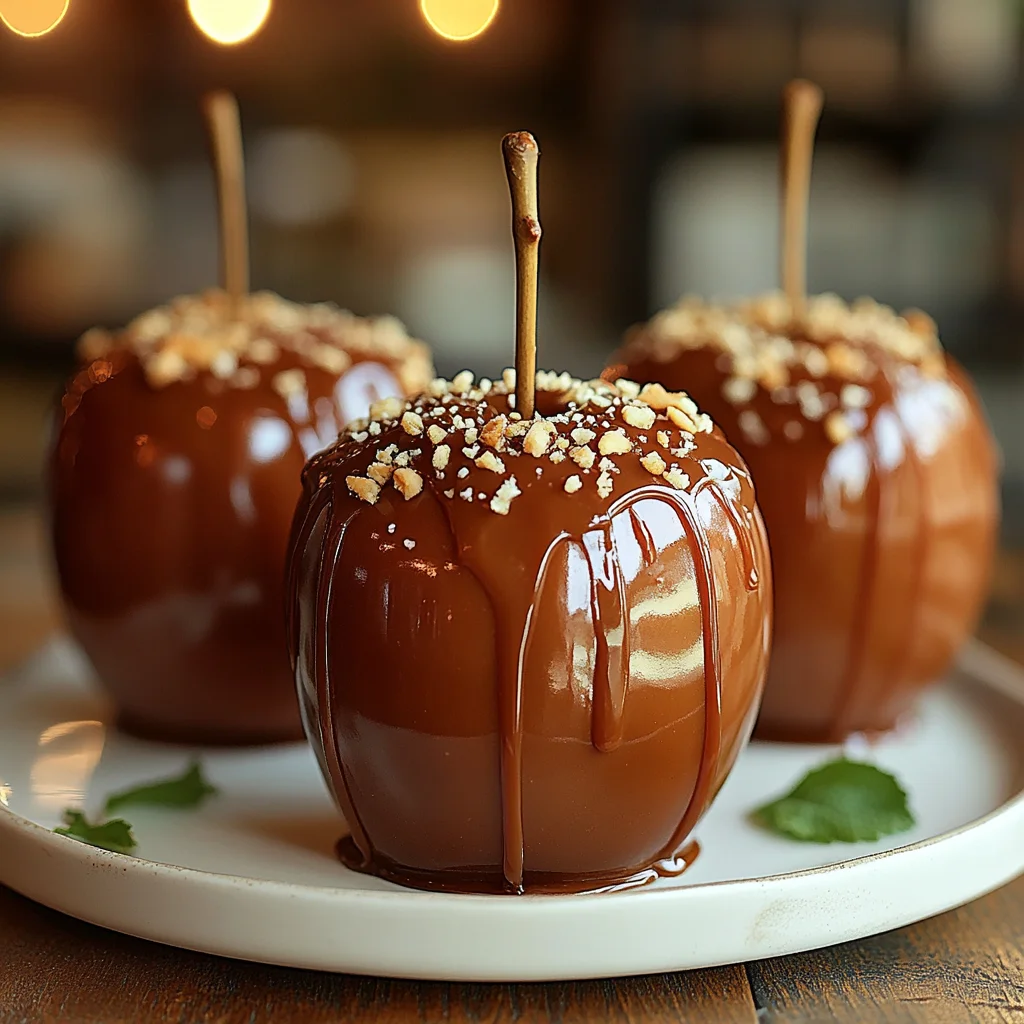
Oh, friend, do you ever get that feeling when the air turns crisp, the leaves start to whisper their fiery secrets, and suddenly, all you can think about are cozy sweaters, pumpkin spice, and the glorious, sticky-sweet embrace of a homemade caramel apple? For me, it’s a direct portal back to childhood fall festivals, the smell of sugar and apples mingling in the air, and the pure joy of biting into that perfect combination of tart fruit and rich, buttery caramel.
There’s something truly magical about a classic caramel apple. It’s more than just a treat; it’s an experience, a memory in the making. And guess what? You don’t need to brave crowded fairs or struggle with store-bought versions to enjoy this autumn delight. I’m here to tell you that making these iconic beauties at home is not only incredibly simple but also super quick! You’ll be amazed at how easily you can whip up a batch that tastes even better than the ones you remember. Let’s get sticky!
Why You’ll Love Caramel Apples
- Fast: Ready in under 30 minutes, most of which is active cooking time for the caramel.
- Easy: Simple ingredients and straightforward steps mean even beginner bakers can master these.
- Giftable: Wrap them up with a pretty ribbon, and you’ve got the most charming homemade gift for friends, teachers, or neighbors.
- Crowd-pleasing: Who doesn’t love a caramel apple? They’re a hit with kids and adults alike!
Ingredients
Gathering your ingredients for these caramel apples is a breeze. Most of these are likely already in your pantry!
- 6 small apples: I usually go for Granny Smith for that perfect tart contrast to the sweet caramel, but Honeycrisp or Fuji work beautifully too. Just make sure they’re firm!
- 1 (14 ounce) can sweetened condensed milk: This is the secret to a creamy, smooth caramel. Don’t mistake it for evaporated milk!
- 1 cup light brown sugar: Adds that deep, molasses-rich sweetness that defines a good caramel.
- ½ cup unsalted butter: Butter makes everything better, especially caramel. Unsalted gives you control over the final saltiness.
- ½ cup light corn syrup: Essential for preventing the sugar from crystallizing, ensuring your caramel stays silky smooth.
- 1 teaspoon vanilla extract: A splash of vanilla at the end really brightens up and deepens the flavor.
- Pinch of sea salt: Just a tiny pinch makes all the difference, enhancing the caramel’s sweetness and adding a sophisticated edge.
How to Make Caramel Apples
Get ready for some sweet, sticky fun! This process is surprisingly straightforward, and you’ll be a caramel apple pro in no time.
- Prep Your Apples: First things first, you need to wash and thoroughly dry your apples. This step is CRUCIAL, my friend! Any moisture on the apple skin will make it impossible for the caramel to stick. Once they’re sparkling clean and dry, carefully insert a stick or skewer into the stem end of each apple. I like using sturdy wooden skewers or even lollipop sticks. Lay your prepared apples out on a parchment-lined baking sheet – this makes for easy cleanup and prevents sticking later.
- Whip Up the Caramel: Now for the magic! In a medium-sized saucepan, combine your sweetened condensed milk, light brown sugar, unsalted butter, and light corn syrup. Place the saucepan over medium heat. This is where your patience (and stirring arm) comes in handy. You’ll need to cook this mixture, stirring continuously, for about 10 to 12 minutes. You’re looking for it to thicken up nicely and turn a beautiful, rich golden brown. Don’t rush it! That continuous stirring prevents scorching and ensures a smooth consistency.
- Finish the Caramel: Once your caramel is thick and golden, remove the saucepan from the heat. Immediately stir in the vanilla extract and that little pinch of sea salt. Give it a good whisk until everything is well combined and fragrant. Mmm, doesn’t that smell amazing?
- Dip ‘Em Good: This is the fun part! Immediately, while the caramel is still hot and wonderfully dippable, take each apple by its stick. Dip it into the hot caramel, tilting and twisting the apple to get it completely coated. Let any excess caramel drip back into the pan. You want a good, even layer.
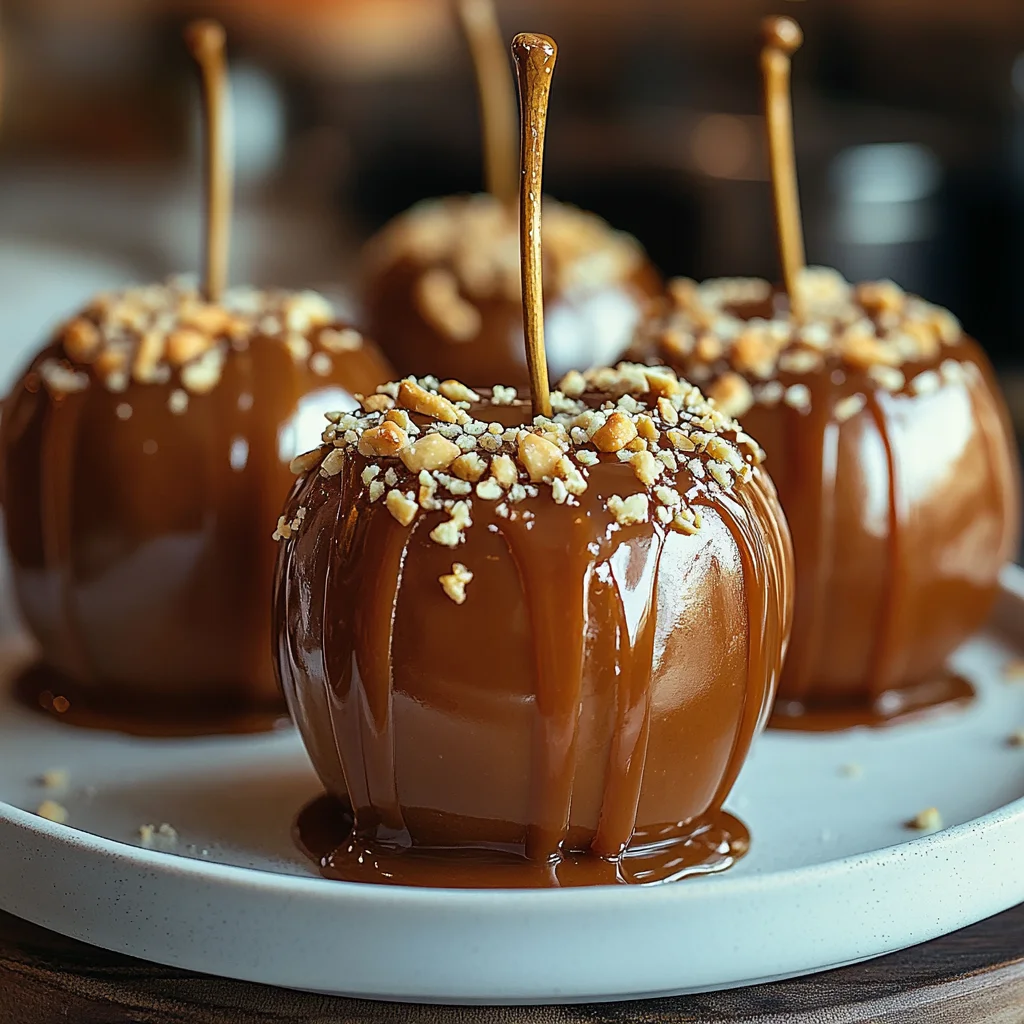
- Add Your Favorite Toppings: Time to get creative! While the caramel is still warm and delightfully sticky, immediately roll your caramel-coated apples in your desired toppings. Think chopped nuts (pecans, walnuts, peanuts!), mini chocolate chips, colorful sprinkles, or even crushed candies. This is where you can truly personalize each apple! If you’re a fan of those sweet and salty combos, you absolutely must try my easy no-bake caramel pretzel bars next – you know I love a good caramel treat!
- Set and Enjoy: Once topped, place your dipped apples back on the parchment-lined baking sheet. Let them cool and set at room temperature. This usually takes about 30 minutes to an hour, or you can pop them in the fridge for a quicker set.
Substitutions & Additions
One of the best things about caramel apples is how easily you can customize them!
- Apple Varieties: While Granny Smith gives that classic tart counterpoint, feel free to experiment! Gala, Fuji, Honeycrisp, or even a mix can be fantastic. Just ensure they are firm and small to medium in size.
- Topping Galore: This is where the real fun begins!
- Nuts: Chopped peanuts, pecans, walnuts, almonds – toast them lightly for extra flavor.
- Chocolate: Mini chocolate chips (milk, dark, or white), melted chocolate drizzled on top, or crushed chocolate bars.
- Candy: Crushed M&Ms, Heath bars, Oreos, pretzels, or even mini marshmallows.
- Spices: A sprinkle of cinnamon sugar or apple pie spice after dipping can add a wonderful warmth.
- Flavor Boosts: A tiny dash of rum extract or maple extract can add an interesting twist to your caramel, but always add it with the vanilla at the very end.
Tips for Success
Making perfect caramel apples is all about a few key details. Don’t worry, I’ve got your back with these pro tips!
- Bone Dry Apples: I cannot stress this enough – your apples absolutely, positively must be completely dry. Wash them, then dry them with a clean towel, and let them air dry for a bit if you have time. Any moisture will act as a barrier, causing your beautiful caramel to slide right off.
- Room Temperature Apples: While some recipes say to chill them, I find room temperature apples work best for adherence. If they’re too cold, the caramel will seize too quickly and won’t coat smoothly.
- Prep Your Station: Have your sticks inserted into the apples and your parchment-lined baking sheet ready before you even start the caramel. Also, have all your desired toppings laid out in shallow dishes. Once the caramel is ready, you need to work quickly!
- The Right Pot: Use a medium-sized, heavy-bottomed saucepan. This helps distribute heat evenly and prevents the caramel from scorching.
- Stir Constantly: Seriously, don’t walk away from that caramel! Continuous stirring prevents it from sticking to the bottom and burning, ensuring a smooth, lump-free result.
- Don’t Overcook: Keep an eye on the color and thickness. If you overcook it, the caramel will become too hard to bite into once cooled. It should be thick and golden brown, but still pourable.
- Warm Caramel for Toppings: You need to roll the apples in toppings immediately after dipping, while the caramel is still warm and sticky. If it cools too much, the toppings won’t adhere.
- No Wax Coating: Many grocery store apples have a thin wax coating. If you’re concerned, you can briefly dip them in boiling water (about 15-20 seconds) and then immediately scrub them well with a stiff brush and dry thoroughly. This helps remove the wax, allowing the caramel to stick better. If you love the apple and dessert combo, you might also adore my cheesecake stuffed baked apples – another fantastic way to enjoy this seasonal fruit!
How to Store Caramel Apples
Once your beautiful caramel apples are set, you’ll want to store them properly to keep them fresh and delicious.
- Individual Wrapping: The best way to store them is to individually wrap each apple tightly in plastic wrap. This prevents them from sticking to each other and keeps air out, which can dry out the caramel.
- Refrigeration: Store the wrapped caramel apples in the refrigerator. The cool temperature helps the caramel stay firm and prevents it from getting too sticky or runny.
- Shelf Life: Properly stored caramel apples will last in the refrigerator for about 5-7 days. While they might still be edible after that, the apples can start to soften, and the caramel might lose some of its fresh texture.
- Serving Tip: For the best eating experience, let your caramel apples sit at room temperature for about 15-20 minutes before serving. This softens the caramel just enough to make it easier to bite into.
FAQs
Q: What kind of apples are best for caramel apples?
A: Tart, crisp apples like Granny Smith are generally considered the best as their tartness perfectly balances the sweet caramel. However, Honeycrisp, Fuji, or Gala apples also work well for a slightly sweeter caramel apple experience.
Q: Why is my caramel sliding off the apples?
A: The most common reason is moisture or a waxy coating on the apple skin. Ensure your apples are thoroughly washed, completely dried (bone dry!), and at room temperature before dipping. If your apples have a thick wax coating, a quick dip in boiling water for 15-20 seconds followed by a good scrub and dry can help.
Q: Can I make the caramel ahead of time?
A: While caramel apples are best when the caramel is made fresh and used immediately, you can make the caramel up to a day ahead. Store it in an airtight container at room temperature. When ready to use, gently reheat it over low heat, stirring frequently, until it’s smooth and dippable again. Be careful not to overheat it!
Q: What if my caramel is too thick or too thin?
A: If your caramel is too thick, you can add a tiny bit (1-2 teaspoons) of hot water or milk while gently reheating and stirring, until it reaches the desired consistency. If it’s too thin, it likely hasn’t cooked long enough. You can return it to medium heat and continue cooking, stirring constantly, until it thickens to the right consistency. A good indicator is when it coats the back of a spoon thickly.
Looking for more delightful desserts to share with loved ones? Be sure to check out my recipe for The Ultimate Classic Carrot Cake, a perfect treat for any occasion.
For more delicious recipes and kitchen inspiration, be sure to follow me on Pinterest!

Sweet Perfection: The Ultimate Easy Homemade Caramel Apples Recipe
Ingredients
Equipment
Method
- Step 1: Prep Your Apples: Wash and thoroughly dry your apples. This step is crucial; any moisture will prevent the caramel from sticking. Carefully insert a stick or skewer into the stem end of each apple. Lay your prepared apples out on a parchment-lined baking sheet.
- Step 2: Whip Up the Caramel: In a medium-sized saucepan, combine sweetened condensed milk, light brown sugar, unsalted butter, and light corn syrup. Place the saucepan over medium heat. Cook this mixture, stirring continuously, for about 10 to 12 minutes, until it thickens up nicely and turns a rich golden brown.
- Step 3: Finish the Caramel: Once your caramel is thick and golden, remove the saucepan from the heat. Immediately stir in the vanilla extract and the pinch of sea salt. Whisk until everything is well combined.
- Step 4: Dip 'Em Good: Immediately, while the caramel is still hot and wonderfully dippable, take each apple by its stick. Dip it into the hot caramel, tilting and twisting the apple to get it completely coated. Let any excess caramel drip back into the pan for a good, even layer.
- Step 5: Add Your Favorite Toppings: While the caramel is still warm and delightfully sticky, immediately roll your caramel-coated apples in your desired toppings such as chopped nuts, mini chocolate chips, colorful sprinkles, or crushed candies.
- Step 6: Set and Enjoy: Place your dipped apples back on the parchment-lined baking sheet. Let them cool and set at room temperature for about 30 minutes to an hour, or pop them in the fridge for a quicker set.