Oh, friend, do you ever just crave something sweet, something that feels a little bit special, maybe even a little bit nostalgic? For me, that feeling often comes wrapped up in fresh strawberries. They just scream sunshine and happy days, don’t they?
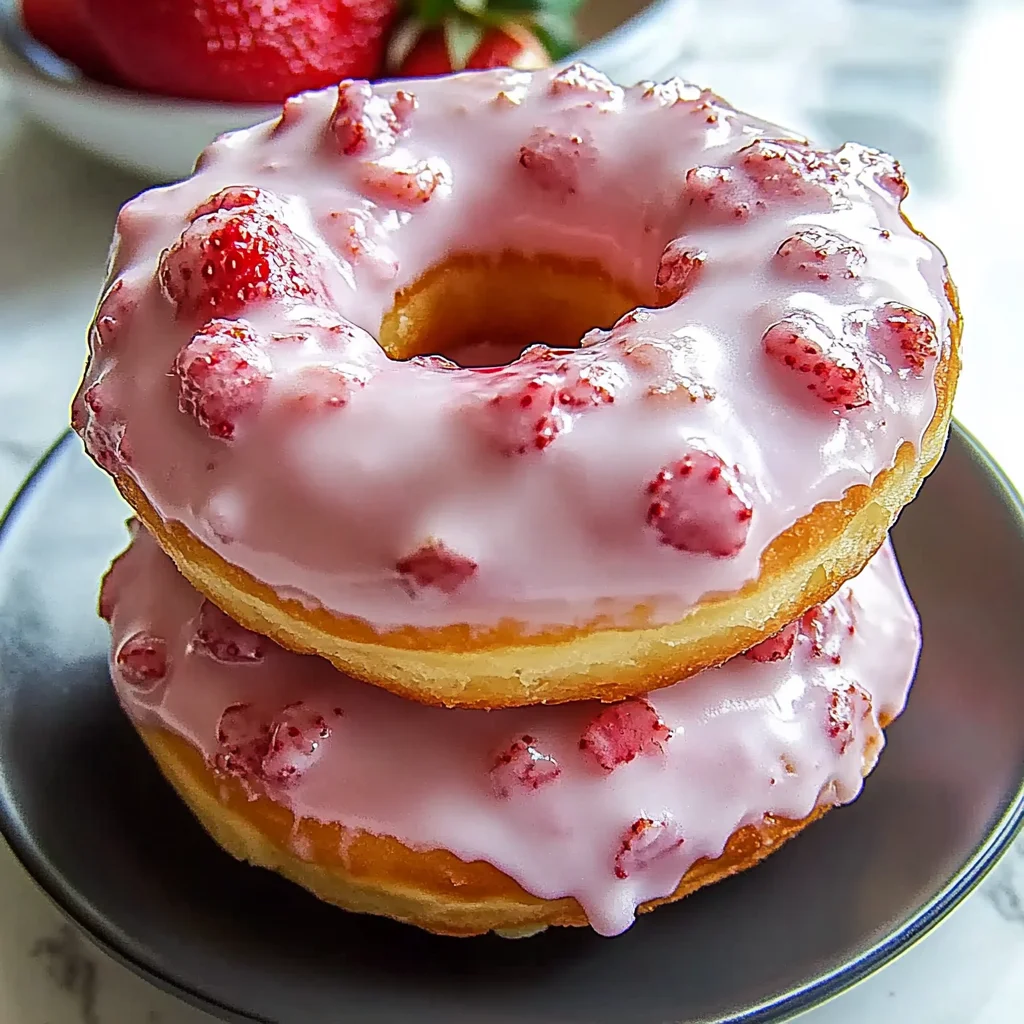
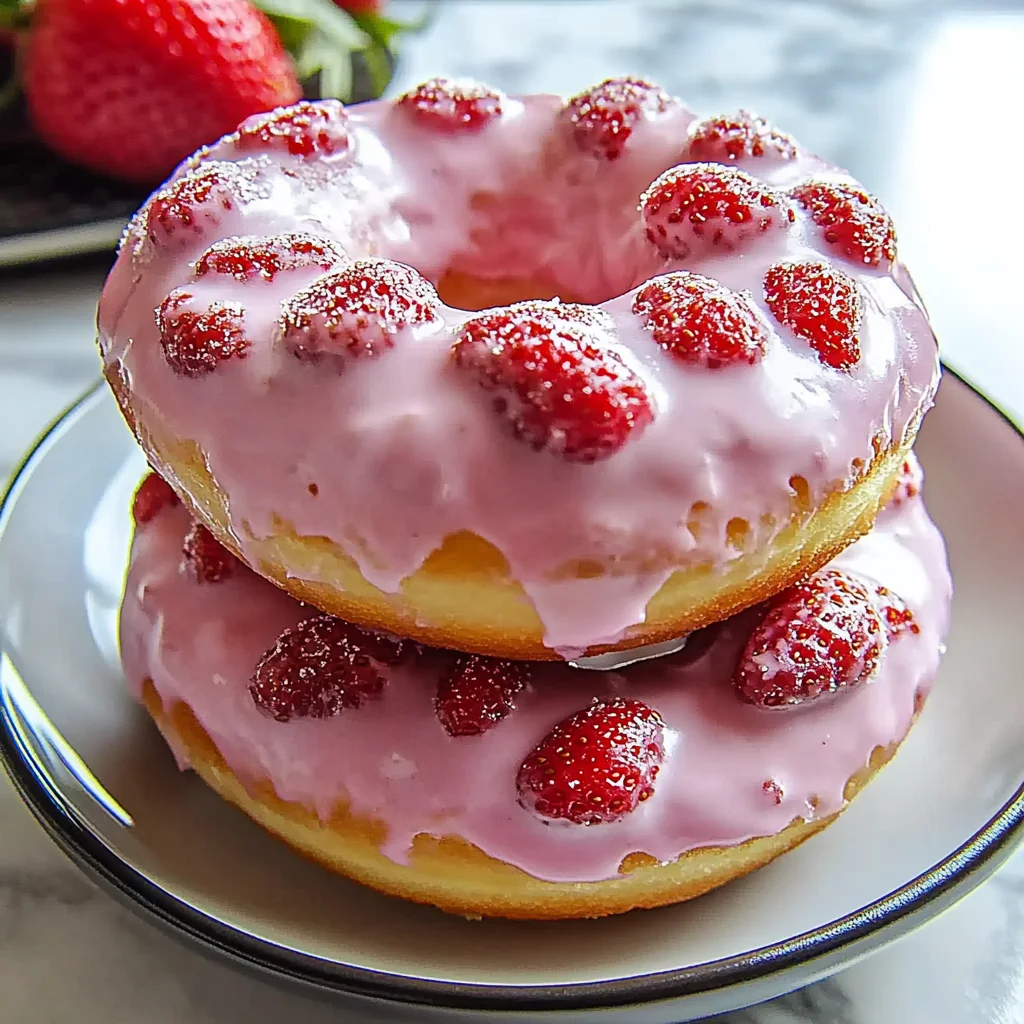
Well, imagine those bright, juicy strawberries baked into a tender, fluffy cake donut, then dipped in a dreamy, vibrant strawberry glaze. Pure magic! And the best part? You don’t need a deep fryer or any fancy equipment. These beauties are baked right in your oven, making them super easy, quick, and frankly, way less messy than traditional donuts.
This recipe is one of my favorites because it brings that bakery-style joy right into your own kitchen without the fuss. They’re perfect for a lazy weekend brunch, a fun afternoon snack, or even packaging up as a sweet little gift for a friend. Let’s make some happy memories (and donuts!) together!
Why You’ll Love This Recipe
- Fast: Ready in under 30 minutes!
- Easy: No frying needed, simple baking steps.
- Giftable: Package them up for friends or neighbors.
- Crowd-pleasing: Who can resist a strawberry donut?
Ingredients
Gathering your ingredients is the first step to deliciousness! Here’s what you’ll need for these lovely donuts:
- All-purpose flour: Just your standard baking flour.
- Granulated sugar: Sweetness for our cake base.
- Baking powder & baking soda: Our leavening agents to make them light and airy.
- Salt: Just a pinch to balance the sweetness.
- Finely chopped fresh strawberries: The star of the show! Make sure they’re chopped quite small so they distribute nicely.
- Milk: Any kind you have on hand works.
- Plain Greek yogurt or sour cream: This is my little secret for extra moisture and a tender crumb. Don’t skip it!
- Large egg: Helps bind everything together.
- Unsalted butter, melted: Adds richness and that wonderful cake texture.
- Vanilla extract: Enhances all the flavors.
And for that luscious glaze:
- Powdered sugar: The base for our quick glaze.
- Strawberry puree: Blend a few fresh strawberries until smooth. This gives it natural flavor and color!
- Vanilla extract: A little extra flavor boost.
- Optional: pink food coloring: If you want a really vibrant pink glaze, a tiny drop helps!
How to Make It
Alright, apron on? Let’s bake some donuts! It’s easier than you think, promise.
Step 1: First things first, preheat your oven to 350°F (175°C). Then, grab your donut pan and give it a light grease. This helps those beautiful donuts pop right out after baking.
Step 2: In a nice big bowl, whisk together your dry ingredients: the flour, sugar, baking powder, baking soda, and salt. Just a quick whisk to make sure everything is combined.
Step 3: In a separate bowl, whisk together your wet ingredients: the milk, yogurt (or sour cream), egg, melted butter, and vanilla. Once that’s smooth, gently stir in your finely chopped strawberries. It’s going to look so pretty already!
Step 4: Now, add the wet ingredients to the dry ingredients. Stir everything together until it’s just combined. Seriously, stop stirring as soon as you don’t see any dry streaks of flour. Overmixing can make cake donuts tough, and we want these to be wonderfully tender.
Step 5: Spoon or pipe the batter into your prepared donut pan. I like to use a piping bag with the end snipped off, or even just a zip-top bag, but two spoons work just fine too! Fill each cavity about 3/4 full. Don’t overfill, or you’ll lose that perfect donut shape.
Step 6: Pop the pan into your preheated oven. Bake for about 12–14 minutes. You’ll know they’re ready when they look golden around the edges and spring back a little when you gently touch them.
Step 7: Let the donuts hang out in the pan for about 5 minutes after you pull them out of the oven. This helps them set up. Then, carefully transfer them to a wire rack to cool completely. This step is important before glazing!
Step 8: While the donuts are cooling, whip up that gorgeous glaze. In a small bowl, whisk together the powdered sugar, strawberry puree, and vanilla extract until it’s nice and smooth. If it seems a little thick, add another tiny drop of strawberry puree or milk. If it’s too thin, add a little more powdered sugar. If you want that bright bakery pink, add a tiny drop of food coloring now.
Step 9: Once the donuts are completely cool (seriously, wait until they’re cool!), dip the top of each donut into the glaze. Let the excess drip off back into the bowl.
Step 10: Place the glazed donuts back on the wire rack to let the glaze set. If you love a thicker glaze (like I do!), wait a few minutes for the first layer to slightly firm up, then give them a second dip.
Substitutions & Additions
Want to get creative? Here are a few ideas to switch things up!
Try using other berries like blueberries or raspberries instead of or in addition to strawberries. Just chop them finely like you would the strawberries. A little bit of lemon zest added to the batter or glaze would be absolutely lovely with the strawberries. Instead of the strawberry glaze, you could make a simple vanilla glaze (powdered sugar, milk, vanilla extract) or even a cream cheese glaze. And of course, sprinkles! Add them right after dipping the donuts in the glaze before it sets.
Tips for Success
- Don’t overmix the batter! Stirring until just combined is key for tender donuts.
- Finely chop the strawberries. Larger chunks can sink or make the batter uneven.
- Grease your pan well. Even if it’s non-stick, a little grease is extra insurance.
- Don’t overfill the cavities. About 3/4 full gives them room to rise without losing shape.
- Cool completely before glazing. Glazing warm donuts will result in a messy, runny glaze that doesn’t set properly.
- Make smooth strawberry puree. Ensure there are no chunks for a smooth glaze. You might even strain it if you like it extra smooth.
How to Store It
These donuts are best enjoyed fresh, but they’ll keep! Store them in an airtight container at room temperature for a day or two. If you need them to last longer, pop them in the fridge for up to 4-5 days. They might lose a little bit of moisture in the fridge, but they’ll still be delicious!
FAQs
Q: Can I fry these donuts?
A: No, this recipe is specifically developed for baked cake donuts. The batter consistency and leavening are meant for baking, not frying.
Q: Can I use frozen strawberries?
A: Yes, you can! Just make sure to thaw them completely and drain off all the excess liquid before chopping them finely. Too much moisture will change the batter consistency.
Q: I don’t have a donut pan! What can I do?
A: No problem! You can use a standard muffin tin. Fill the cavities about half full, and you’ll get delicious strawberry donut “muffins” or donut holes. The baking time might be slightly different, so just watch them until they’re golden and spring back.
Q: Can I make the batter ahead of time?
A: For best results, it’s always best to bake cake batters that use baking powder and soda immediately after mixing. The leavening agents start working as soon as they hit the wet ingredients. The batter comes together so quickly, it’s easy to make just before baking!

Easy Baked Strawberry Cake Donuts
Ingredients
Equipment
Method
- Step 1: First things first, preheat your oven to 350°F (175°C). Then, grab your donut pan and give it a light grease. This helps those beautiful donuts pop right out after baking.
- Step 2: In a nice big bowl, whisk together your dry ingredients: the flour, sugar, baking powder, baking soda, and salt. Just a quick whisk to make sure everything is combined.
- Step 3: In a separate bowl, whisk together your wet ingredients: the milk, yogurt (or sour cream), egg, melted butter, and vanilla. Once that's smooth, gently stir in your finely chopped strawberries. It's going to look so pretty already!
- Step 4: Now, add the wet ingredients to the dry ingredients. Stir everything together until it's just combined. Seriously, stop stirring as soon as you don't see any dry streaks of flour. Overmixing can make cake donuts tough, and we want these to be wonderfully tender.
- Step 5: Spoon or pipe the batter into your prepared donut pan. I like to use a piping bag with the end snipped off, or even just a zip-top bag, but two spoons work just fine too! Fill each cavity about 3/4 full. Don't overfill, or you'll lose that perfect donut shape.
- Step 6: Pop the pan into your preheated oven. Bake for about 12–14 minutes. You'll know they're ready when they look golden around the edges and spring back a little when you gently touch them.
- Step 7: Let the donuts hang out in the pan for about 5 minutes after you pull them out of the oven. This helps them set up. Then, carefully transfer them to a wire rack to cool completely. This step is important before glazing!
- Step 8: While the donuts are cooling, whip up that gorgeous glaze. In a small bowl, whisk together the powdered sugar, strawberry puree, and vanilla extract until it's nice and smooth. If it seems a little thick, add another tiny drop of strawberry puree or milk. If it's too thin, add a little more powdered sugar. If you want that bright bakery pink, add a tiny drop of food coloring now.
- Step 9: Once the donuts are completely cool (seriously, wait until they're cool!), dip the top of each donut into the glaze. Let the excess drip off back into the bowl.
- Step 10: Place the glazed donuts back on the wire rack to let the glaze set. If you love a thicker glaze (like I do!), wait a few minutes for the first layer to slightly firm up, then give them a second dip.