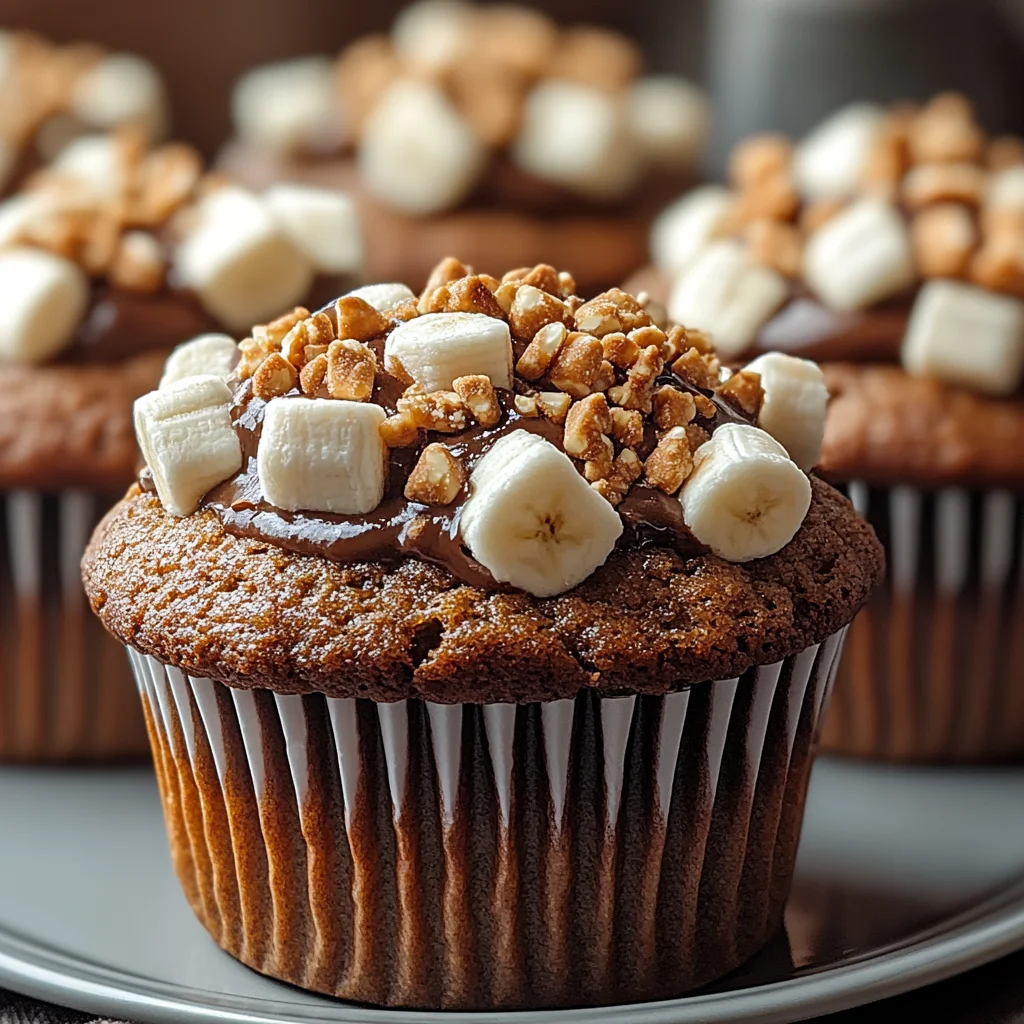
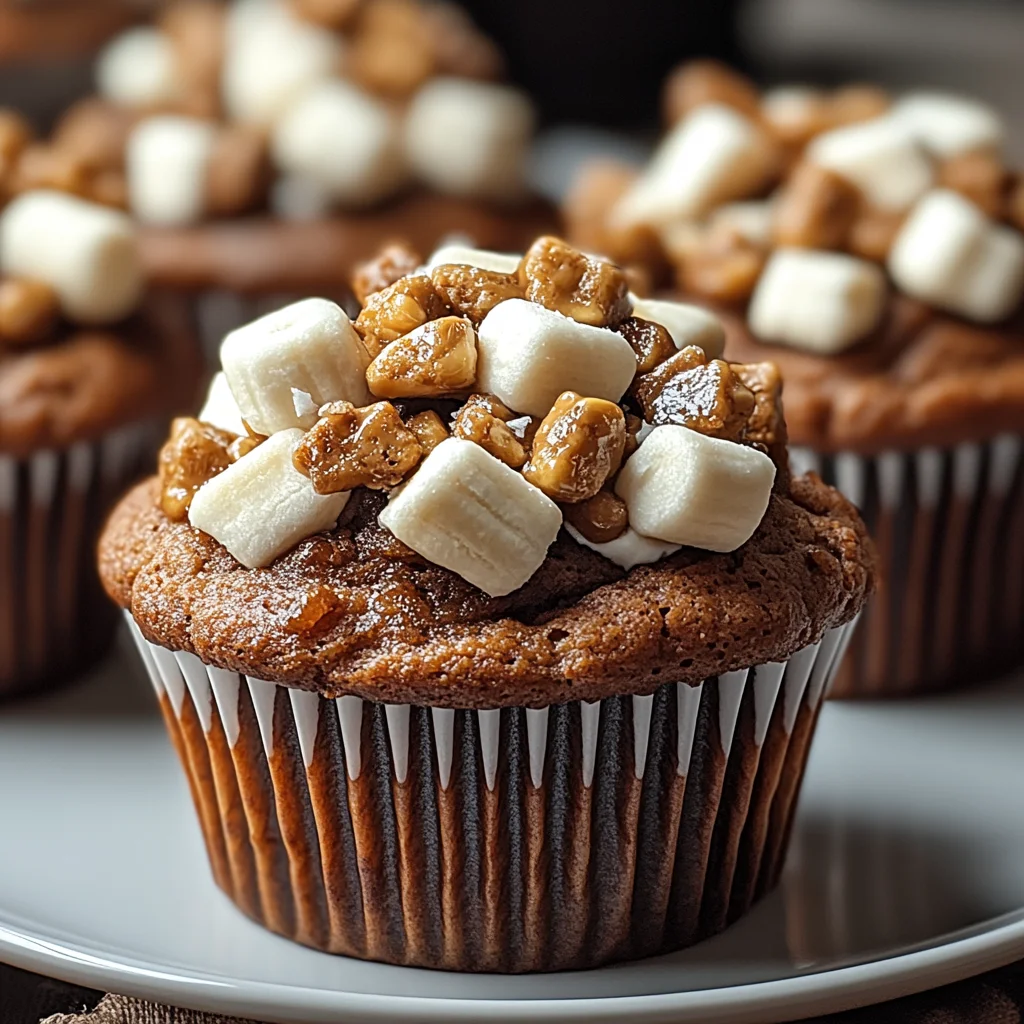
Oh, friend, do you remember those magical nights gathered around a campfire, the crackle of the fire, the smell of toasted marshmallows, the gooey chocolate melting just right between graham crackers? Pure bliss! Well, what if I told you you could capture a little bit of that cozy, nostalgic s’mores magic right in your kitchen, any time you want? And what if I told you it’s tucked inside a warm, moist, incredibly easy banana muffin? Get ready, because these Banana S’mores Muffins are about to become your new go-to treat. They’re the perfect way to use up those spotty bananas AND satisfy that s’mores craving without needing a tent or a campfire!
Why You’ll Love This Recipe
- Fast: From bowl to oven in minutes! Perfect for spontaneous baking moods.
- Easy: So simple, even beginner bakers can nail these. No fancy equipment needed.
- Giftable: Packaged up, these make the sweetest homemade gift for friends and neighbors.
- Crowd-pleasing: Seriously, who doesn’t love s’mores AND banana bread? It’s a winning combo.
Ingredients
Here’s what you’ll need to whip up a batch of these delightful muffins. Chances are, you already have most of these staples in your pantry!
- 2 ripe bananas: The spottier, the better! They’ll be sweeter and mash up beautifully.
- 1/3 cup melted coconut oil: Gives these muffins a lovely moist texture. Vegetable or canola oil work too if that’s what you have.
- 1/2 cup brown sugar: Adds that cozy, caramel-like sweetness.
- 1 large egg: Binds everything together.
- 1 teaspoon vanilla extract: A touch of warmth and flavor.
- 1 cup all-purpose flour: Our basic building block.
- 1 teaspoon baking soda: Helps our muffins rise nice and fluffy.
- 1/2 teaspoon salt: Just a pinch to balance the sweetness and bring out all the flavors.
- 1/2 cup mini marshmallows: For that classic s’mores vibe!
- 1/2 cup chocolate chips: I love semi-sweet, but use your favorite kind!
- Optional: Crushed graham crackers for topping: Adds a lovely little crunch and extra s’mores authenticity on top.
How to Make It
Ready to get baking? It’s super straightforward. Just follow these simple steps:
- First things first, preheat your oven. Set it to 350°F (175°C). While it’s heating up, grab your muffin tin and line it with those pretty paper liners.
- In a medium bowl, take your ripe bananas and mash them up until they’re nice and smooth. A fork works perfectly for this! You want them mashed well, but a few small lumps are totally okay.
- Now, add the melted coconut oil, brown sugar, egg, and vanilla extract to the mashed bananas. Give it a good whisk until everything is combined and looks like a lovely, wet mixture.
- In a separate, smaller bowl, whisk together your dry ingredients: the flour, baking soda, and salt. This helps distribute the leavening evenly.
- Gradually add the dry mixture to the wet mixture. Switch from your whisk to a spoon or spatula now, and stir gently just until the dry ingredients are just incorporated. Be careful not to overmix here – that’s key to tender muffins!
- Now for the fun part – the s’mores goodies! Gently fold in the chocolate chips. If you’re using crushed graham crackers for topping, set those aside for a moment; they’ll go on top before baking. Note: While the ingredients list marshmallows for s’mores, in this specific recipe they are traditionally added on top before baking or after baking if you want them gooey. I’ll tell you more about adding them in the tips below!
- Spoon the batter into your prepared muffin cups, filling each one about two-thirds full. If you’re using crushed graham crackers, sprinkle them generously over the top of the batter in each cup right now.
- Pop the muffin tin into your preheated oven and bake for 18-20 minutes. You’ll know they’re done when a toothpick inserted into the center of a muffin comes out clean.
- Let the muffins cool in the tin for about 5 minutes after they come out of the oven. This helps them firm up a bit before you move them. Then, carefully transfer them to a wire rack to cool completely (if you can wait that long!).
Substitutions & Additions
Want to play around with this recipe? Here are a few ideas:
- Chocolate Swap: Use milk chocolate chips, dark chocolate chunks, or even white chocolate chips for a different twist.
- Marshmallow Magic: For that classic toasted marshmallow look, place a few mini marshmallows on top of each muffin during the last 5 minutes of baking. Watch them closely so they don’t burn! You could also poke a few into the batter before baking, but they tend to melt and disappear into the muffin.
- Graham Cracker Inside: Instead of just on top, you can gently fold about 1/4 cup of crushed graham cracker crumbs into the batter along with the chocolate chips.
- Different Oil: If you don’t have coconut oil, melted butter or another neutral-flavored oil like vegetable or canola will work just fine.
- Spice It Up: Add a pinch of cinnamon (about 1/4 teaspoon) to the dry ingredients for extra warmth.
Tips for Success
Want to make sure your muffins turn out perfect every time? Keep these simple tips in mind:
- Use Ripe Bananas: Seriously, the riper, the better! Those brown spots mean sweetness and moisture.
- Don’t Overmix: Once you add the dry ingredients, stir just until the flour disappears. Overmixing develops the gluten too much, leading to tough muffins. Gentle is the name of the game!
- Filling the Cups: Filling them about 2/3 full gives you nice, domed muffin tops without overflowing.
- Check for Doneness: Start checking around 18 minutes. Ovens vary, and you don’t want to overbake them, which can make them dry. The toothpick test is your friend!
- Cooling is Key: Letting them cool in the tin briefly before moving them helps prevent them from breaking apart. Cooling completely on a wire rack prevents soggy bottoms.
How to Store It
These muffins are definitely best enjoyed warm from the oven, but they store well too!
- Room Temperature: Store cooled muffins in an airtight container at room temperature for 2-3 days.
- Refrigerator: If it’s warm or humid, or if you want them to last a bit longer, you can store them in an airtight container in the fridge for up to 5 days.
- Freezer: For longer storage, place cooled muffins in a freezer-safe bag or container. They freeze beautifully for up to 3 months. Thaw at room temperature or warm gently in the microwave.
FAQs
Got questions? I’ve got answers!
How ripe should the bananas be?
You want them quite ripe, with lots of brown spots on the peel. This means they are naturally sweet and easy to mash, giving you the best flavor and texture.
Can I add marshmallows inside the muffins?
You absolutely can! Fold a few into the batter with the chocolate chips. Just know they will likely melt down into the muffin as they bake, rather than staying intact like they do on top.
Why did my muffins turn out tough?
The most common reason for tough muffins is overmixing the batter after adding the dry ingredients. Mix gently until the flour streaks just disappear.
Can I make a double batch?
Yes! This recipe scales up easily. Just double all the ingredients and you can bake two batches or use two muffin tins if your oven allows.
Cozy Banana S'mores Muffins
Ingredients
Equipment
Method
- Step 1: Preheat your oven to 350°F (175°C). Line a muffin tin with paper liners.
- Step 2: In a medium bowl, mash the ripe bananas until smooth. A few small lumps are okay.
- Step 3: Add the melted coconut oil, brown sugar, egg, and vanilla extract to the mashed bananas. Whisk until combined.
- Step 4: In a separate, smaller bowl, whisk together the flour, baking soda, and salt.
- Step 5: Gradually add the dry mixture to the wet mixture. Switch to a spoon or spatula and stir gently just until the dry ingredients are incorporated. Do not overmix.
- Step 6: Gently fold in the chocolate chips. If using crushed graham crackers for topping, set them aside.
- Step 7: Spoon the batter into the prepared muffin cups, filling each about two-thirds full. If using, sprinkle crushed graham crackers over the top of the batter.
- Step 8: Bake for 18-20 minutes, or until a toothpick inserted into the center comes out clean.
- Step 9: Let the muffins cool in the tin for about 5 minutes, then transfer to a wire rack to cool completely.